
Back to Wildlife Control
Our wildlife process

Inspect, exclude, follow up, then repair.

Wildlife inspections in Brampton and the GTA cost $100–$150 plus HST and require roof access. Raccoon, squirrel, and bird service starts at $450, $350, and $300. Scheduling depends on technician availability and can be immediate when one is free. Wildlife work carries a 3-month warranty on the area and protection Sterex serviced.

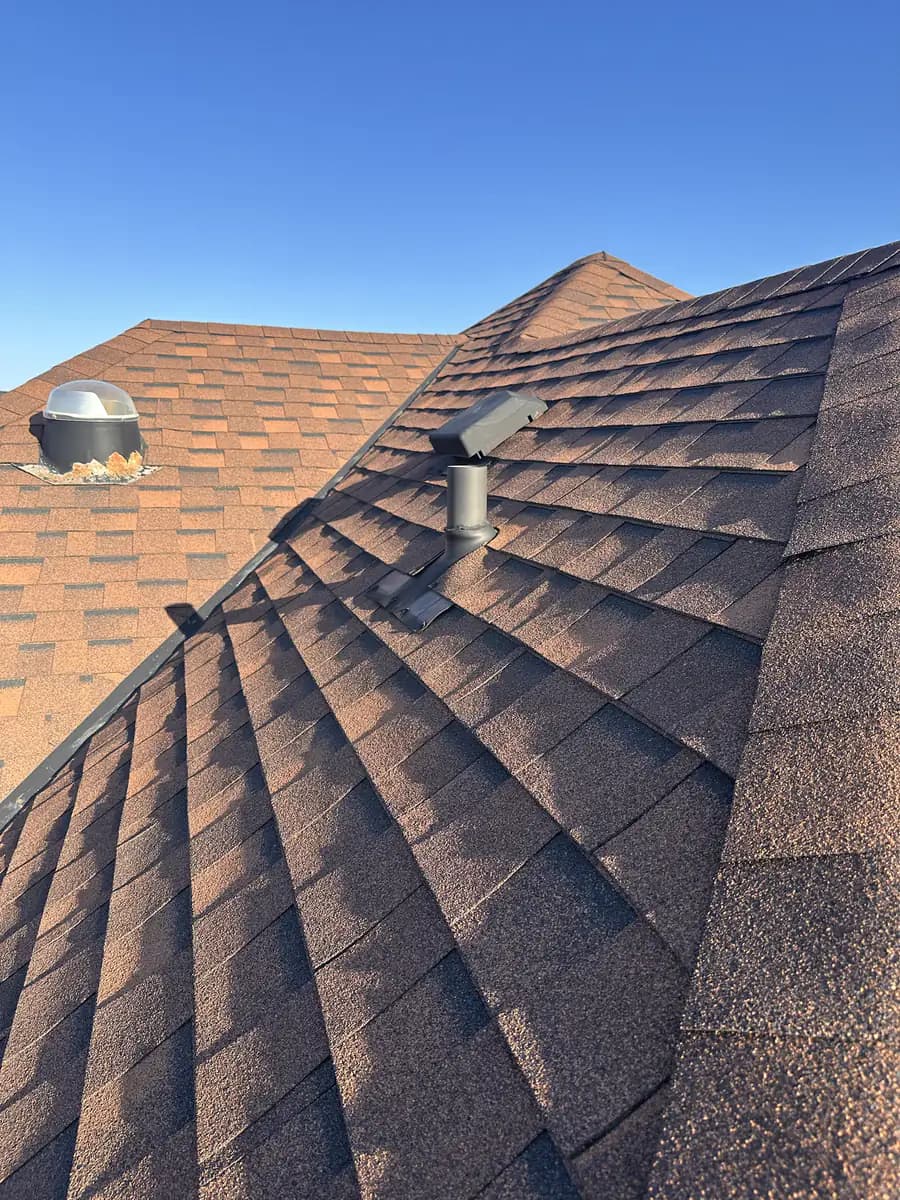
Residential rooftop viewed during a wildlife inspection

Roofline-first diagnosis

Most wildlife jobs are solved by finding the exact opening and closing it after the animal exits.

Work documented on site

What we look for, protect, and repair.

These field photos show the kinds of entry points, evidence, exclusion hardware, and repair details our technicians assess. The image proportions are kept intact so the important details remain visible.

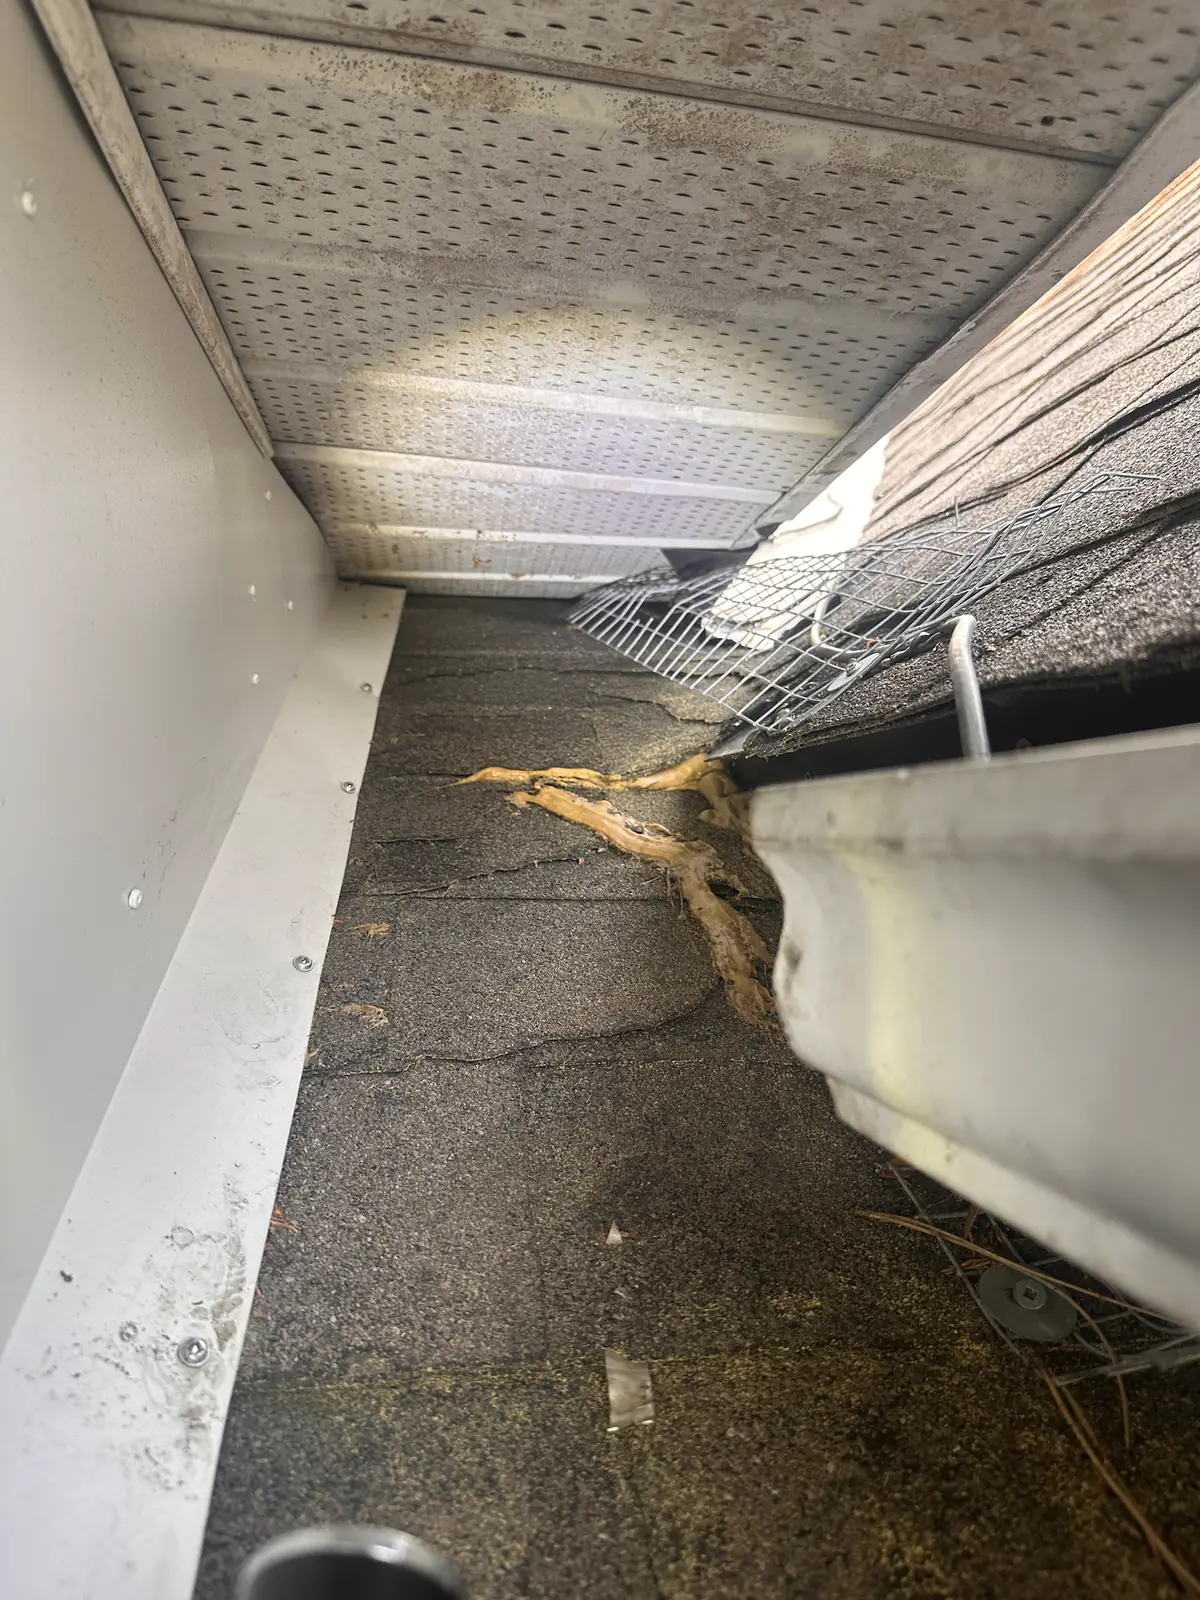
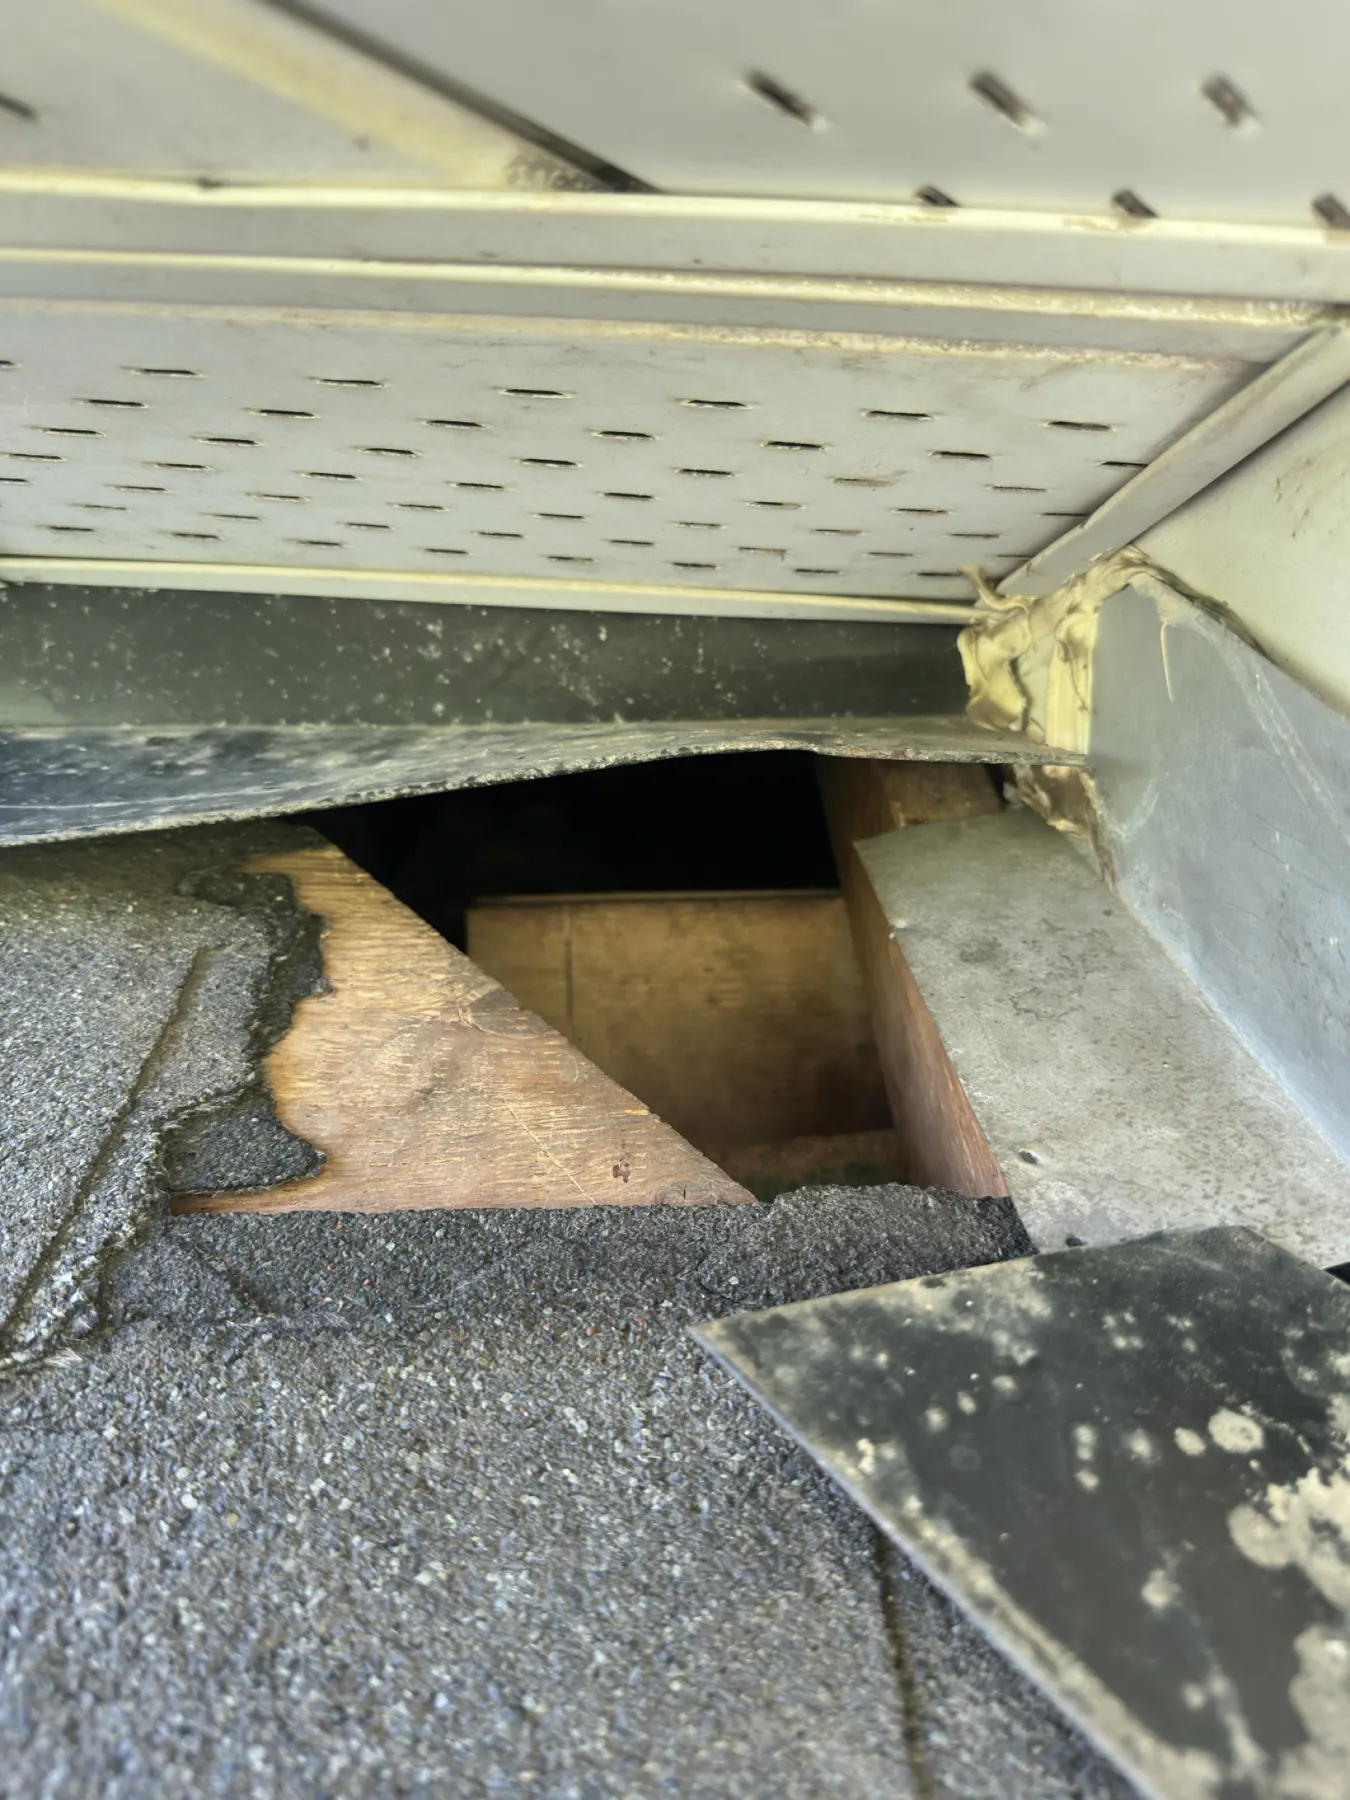
Open gap beneath metal flashing at the edge of a shingled roof
An entry gap identified beneath roof flashing.
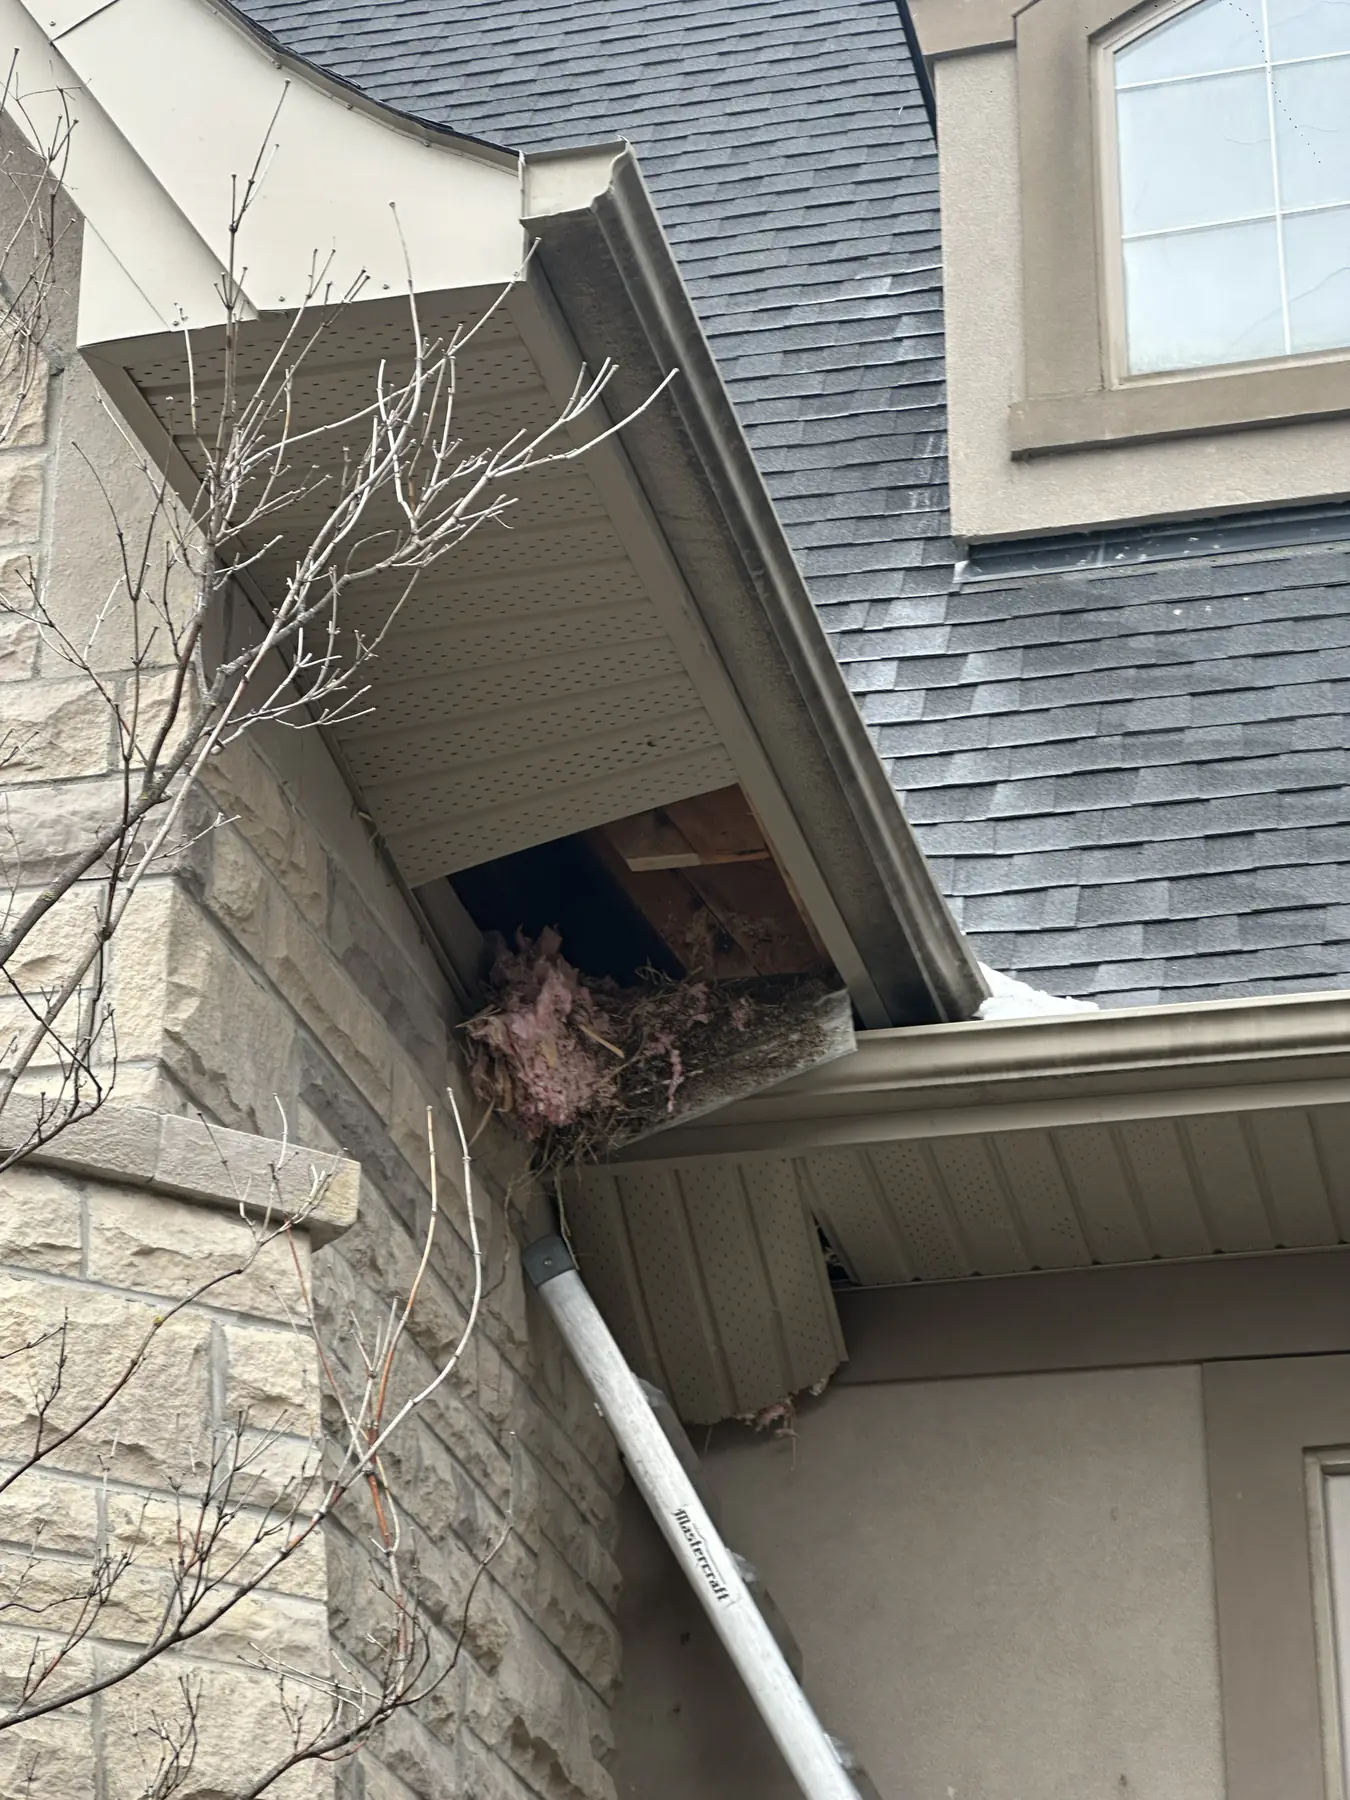
Open soffit cavity containing disturbed insulation and nesting material
Soffit evidence helps trace an active route.
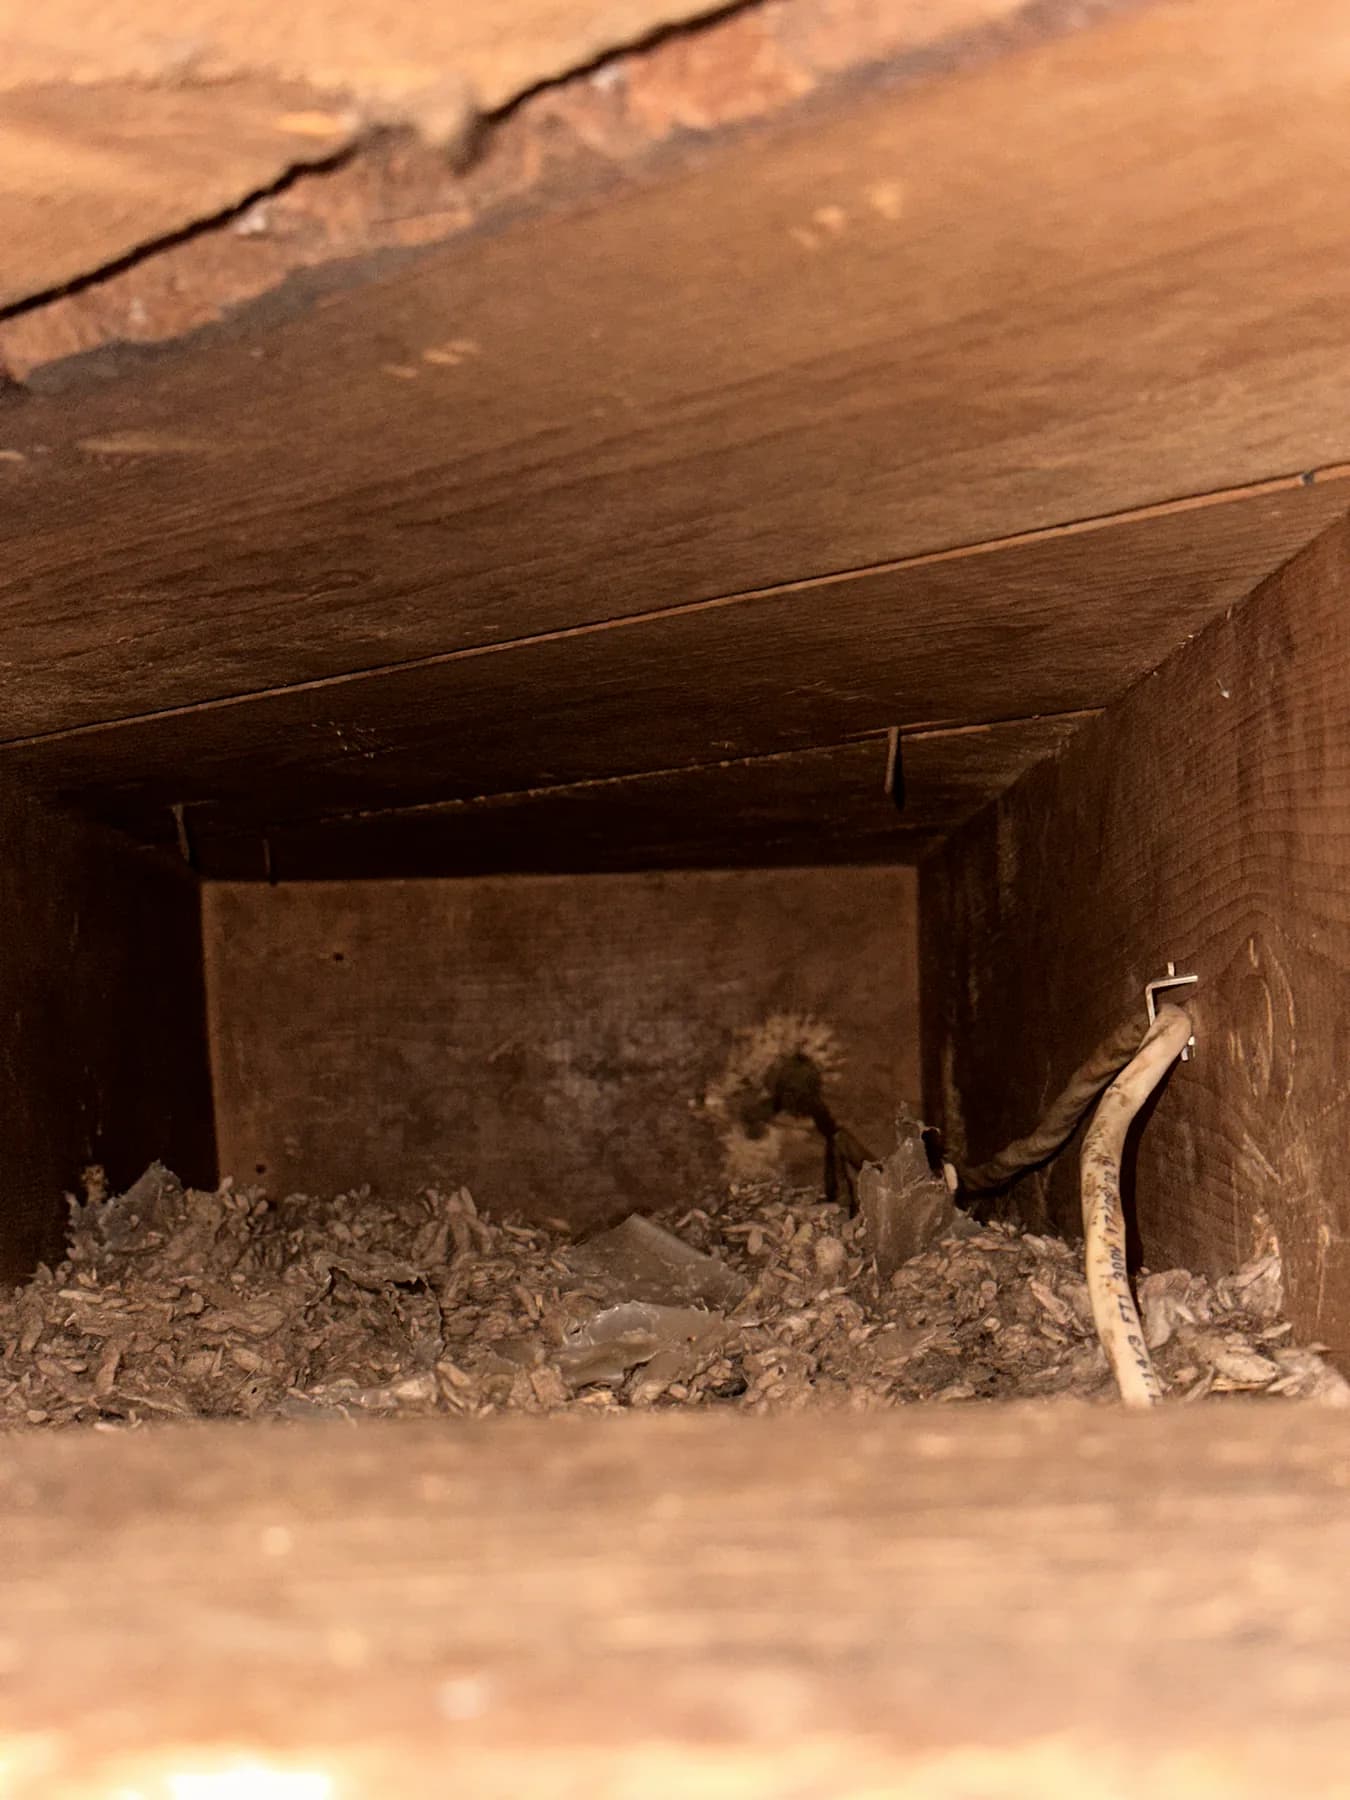
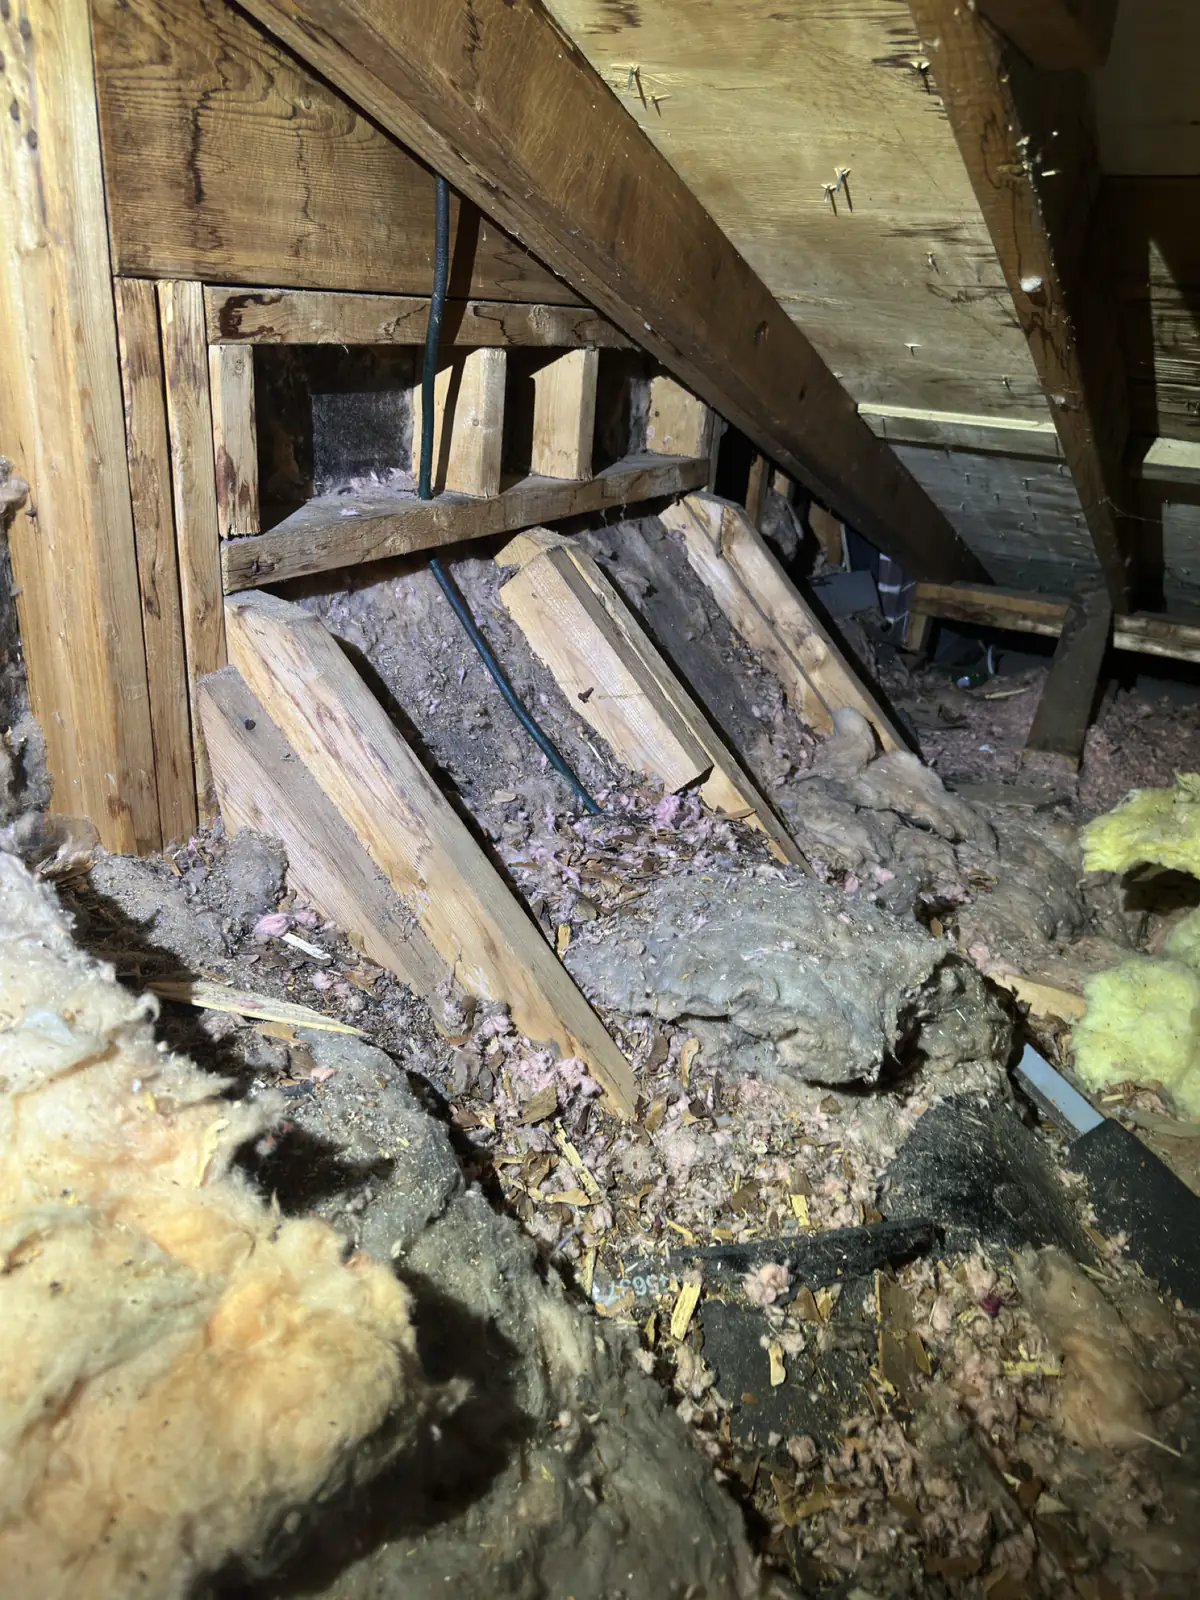
Nesting debris and an exposed cable inside a narrow roof cavity
Nesting debris inside a roof cavity.
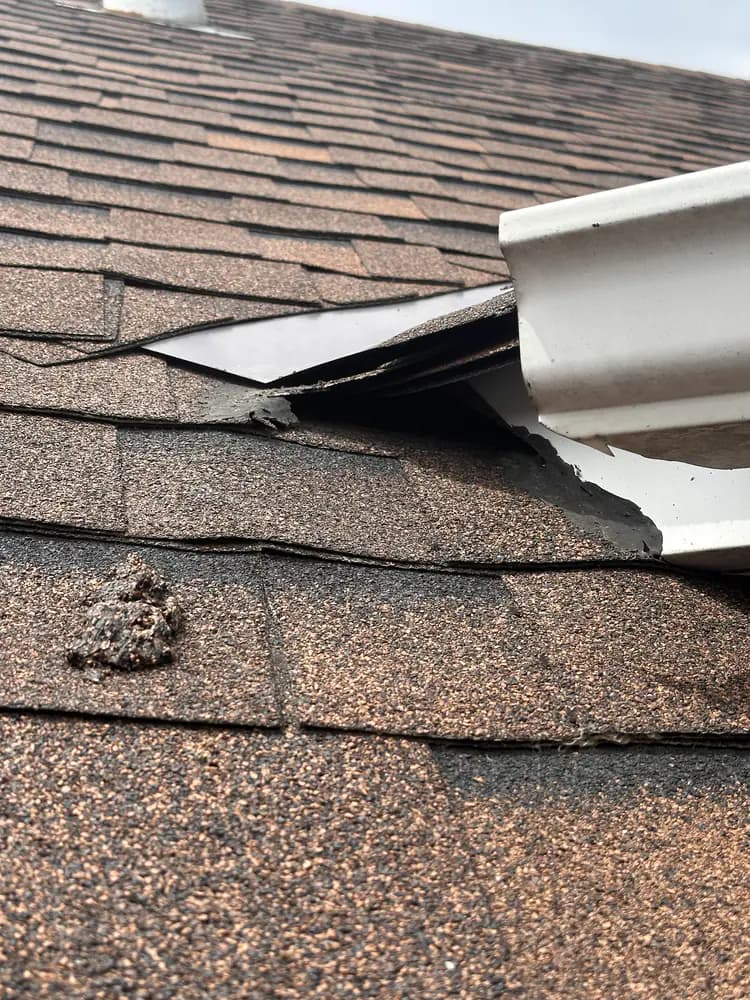
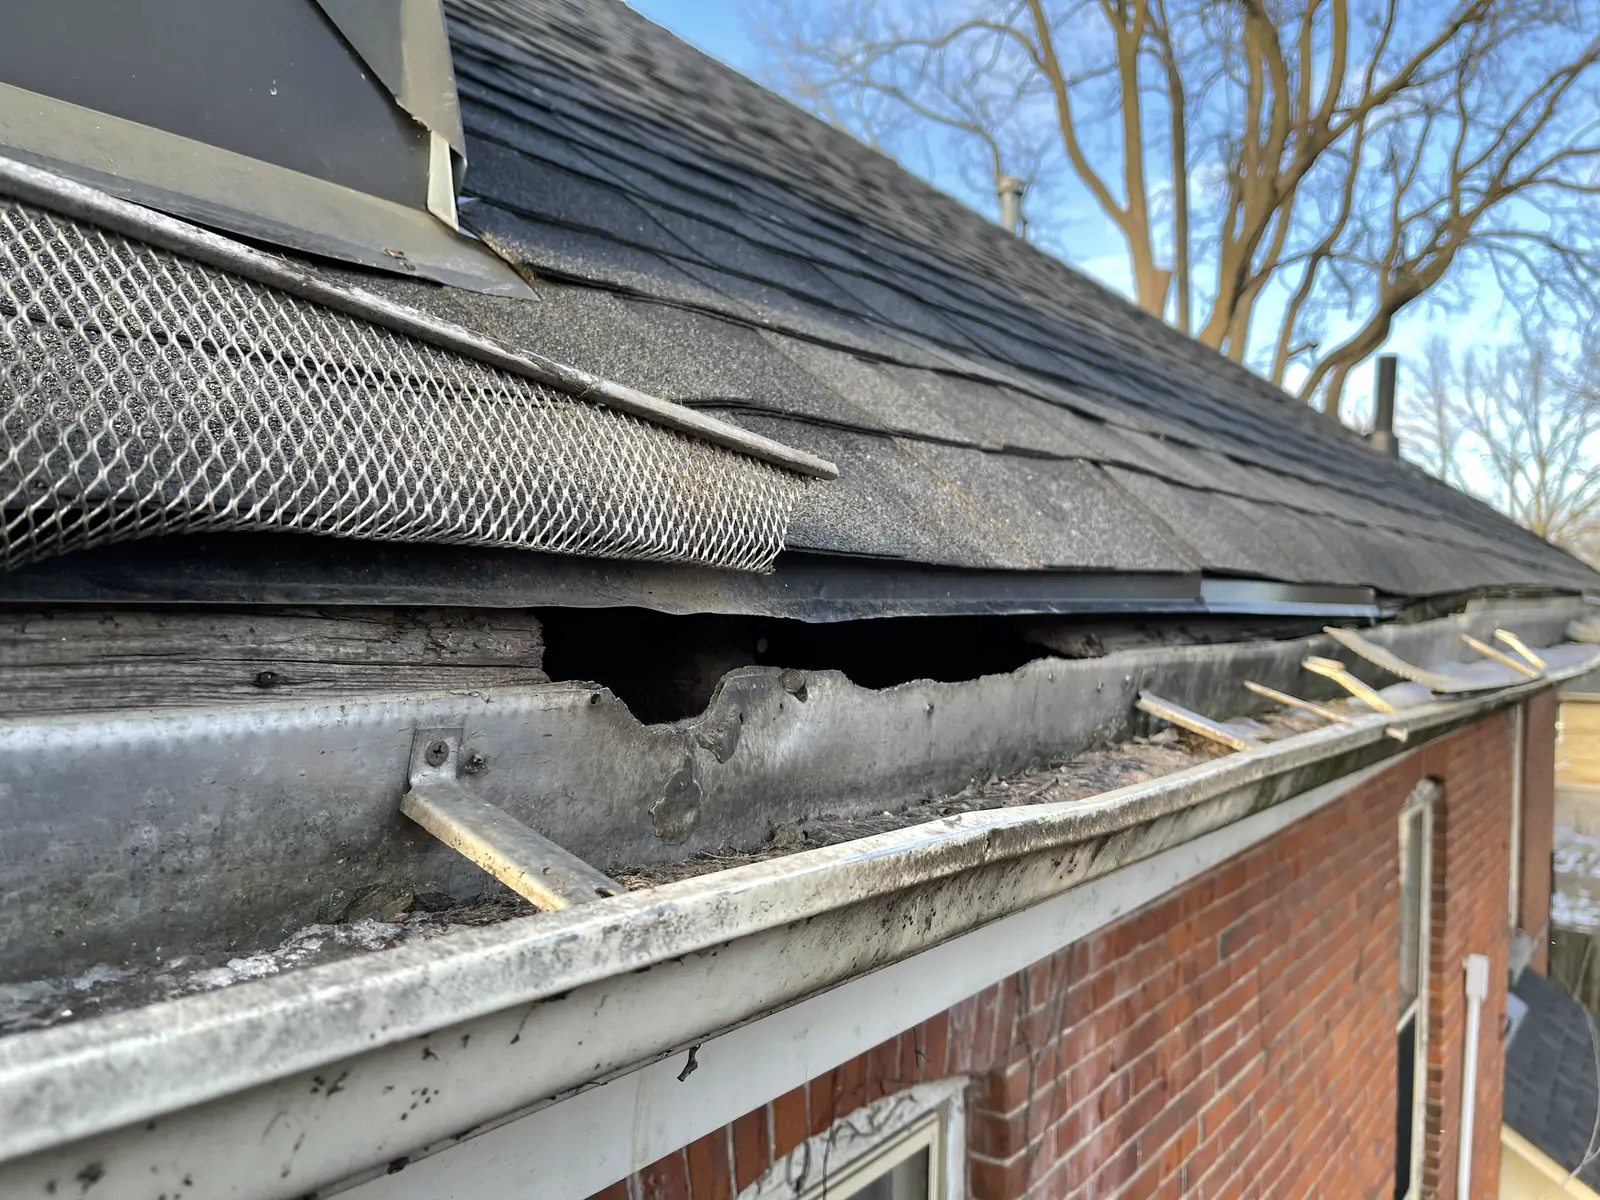
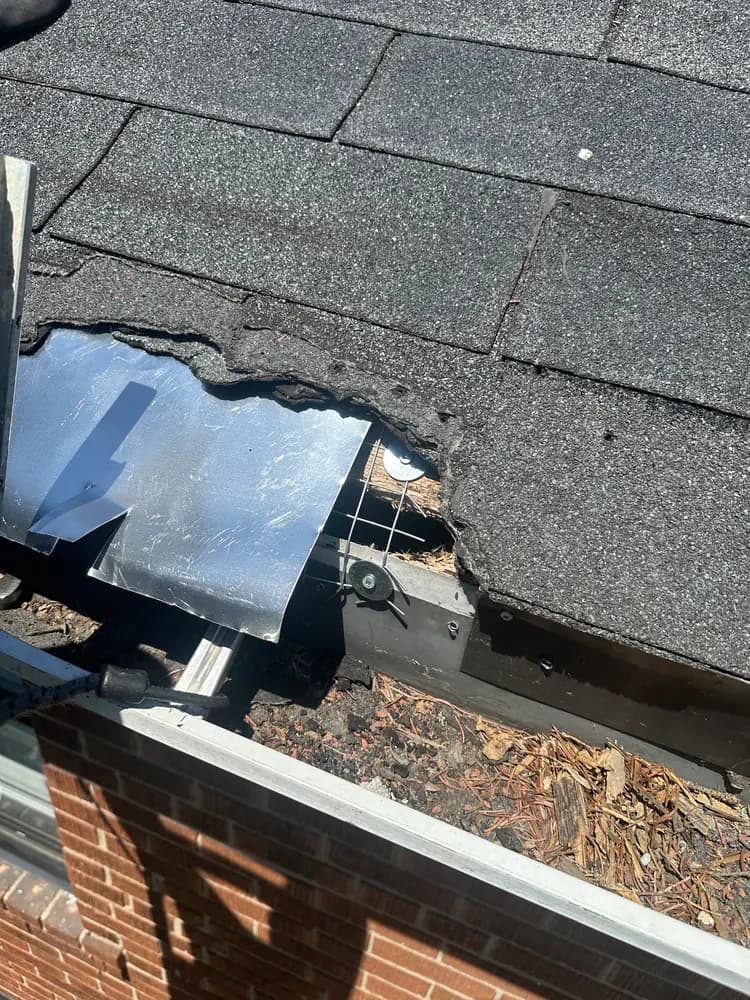
Broken roof-edge material and an open gap beside a gutter
Damaged roof-edge material beside a gutter.
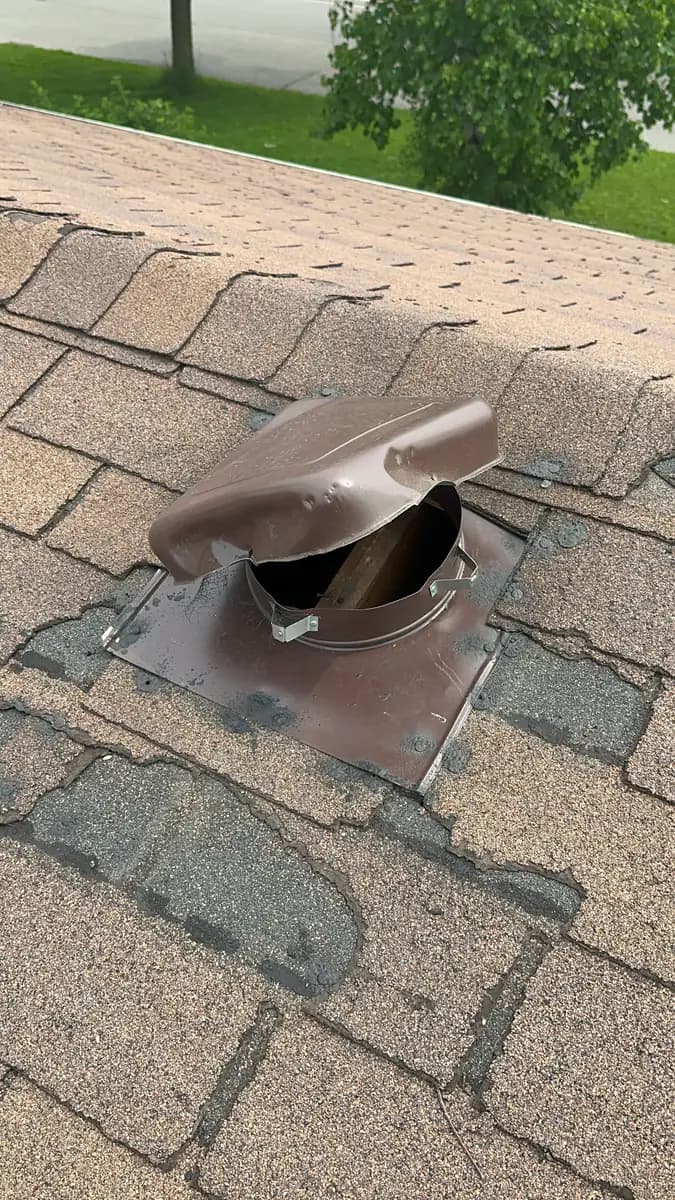
Open square roof vent base exposed on asphalt shingles before exclusion work
A roof vent before protection is installed.
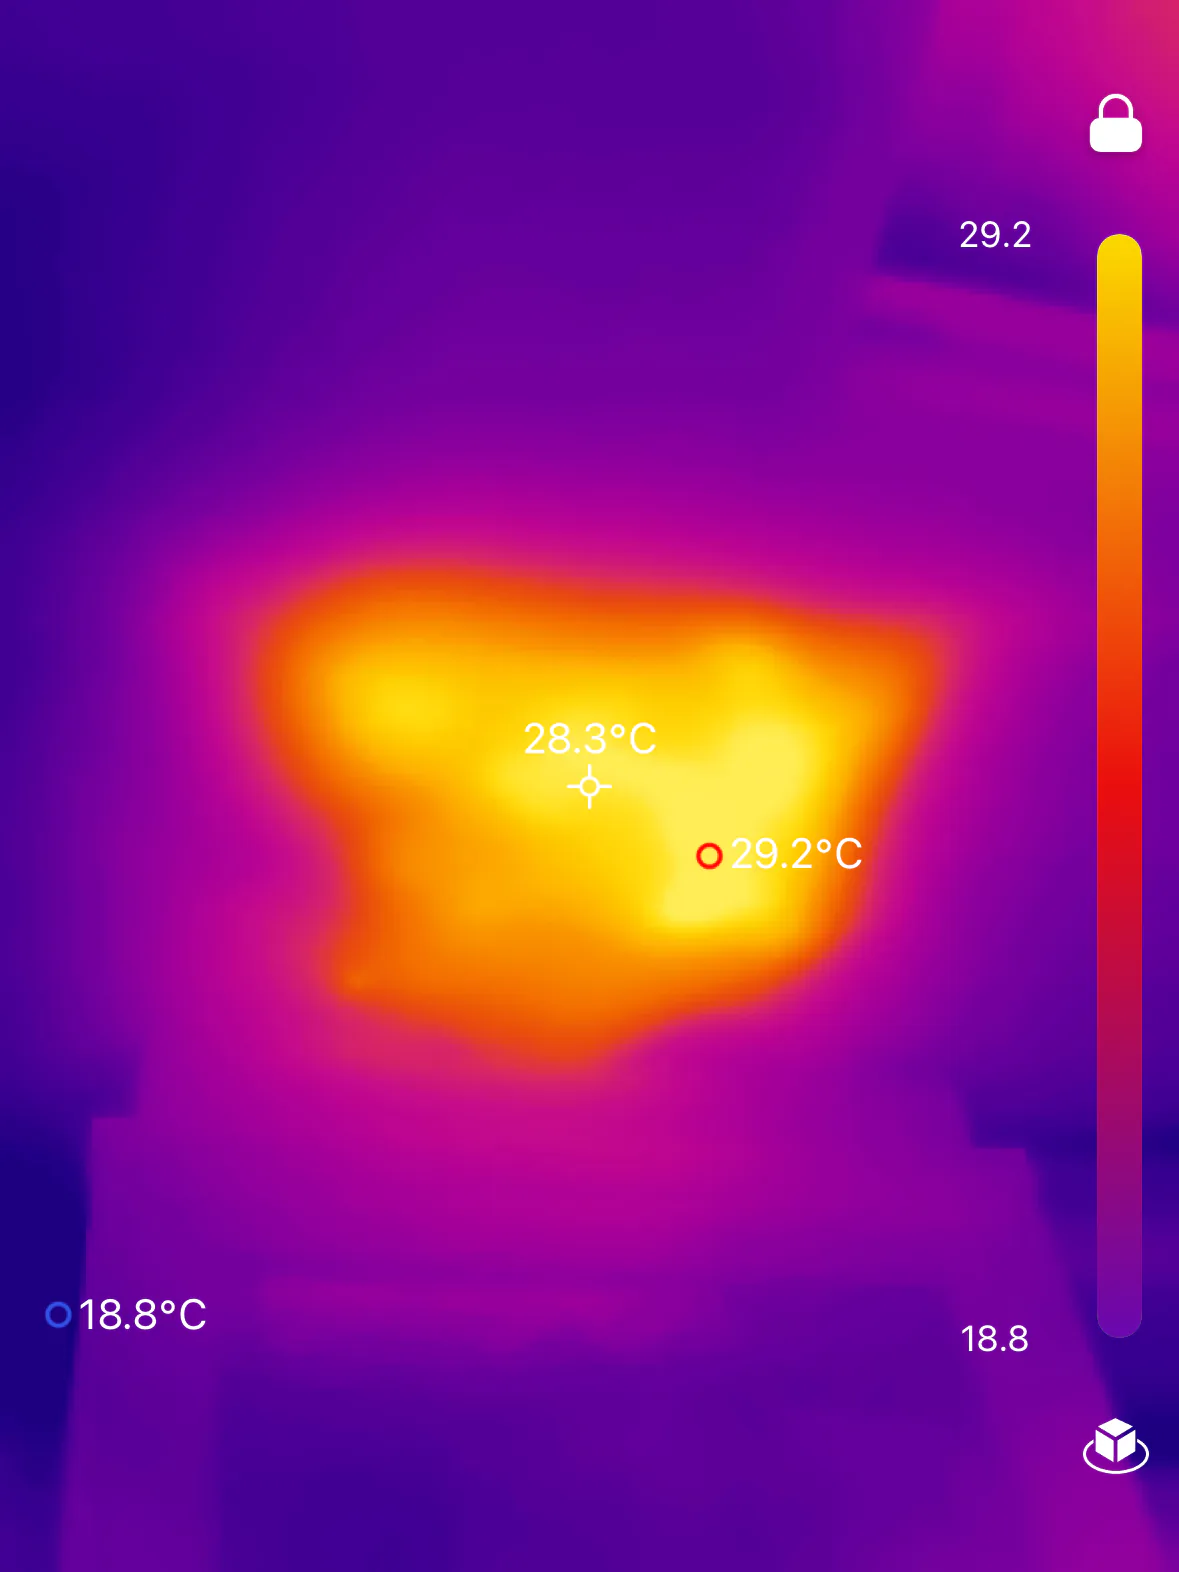
Thermal-camera display showing a warm area against a cooler background
Thermal checks can help investigate a concealed concern.
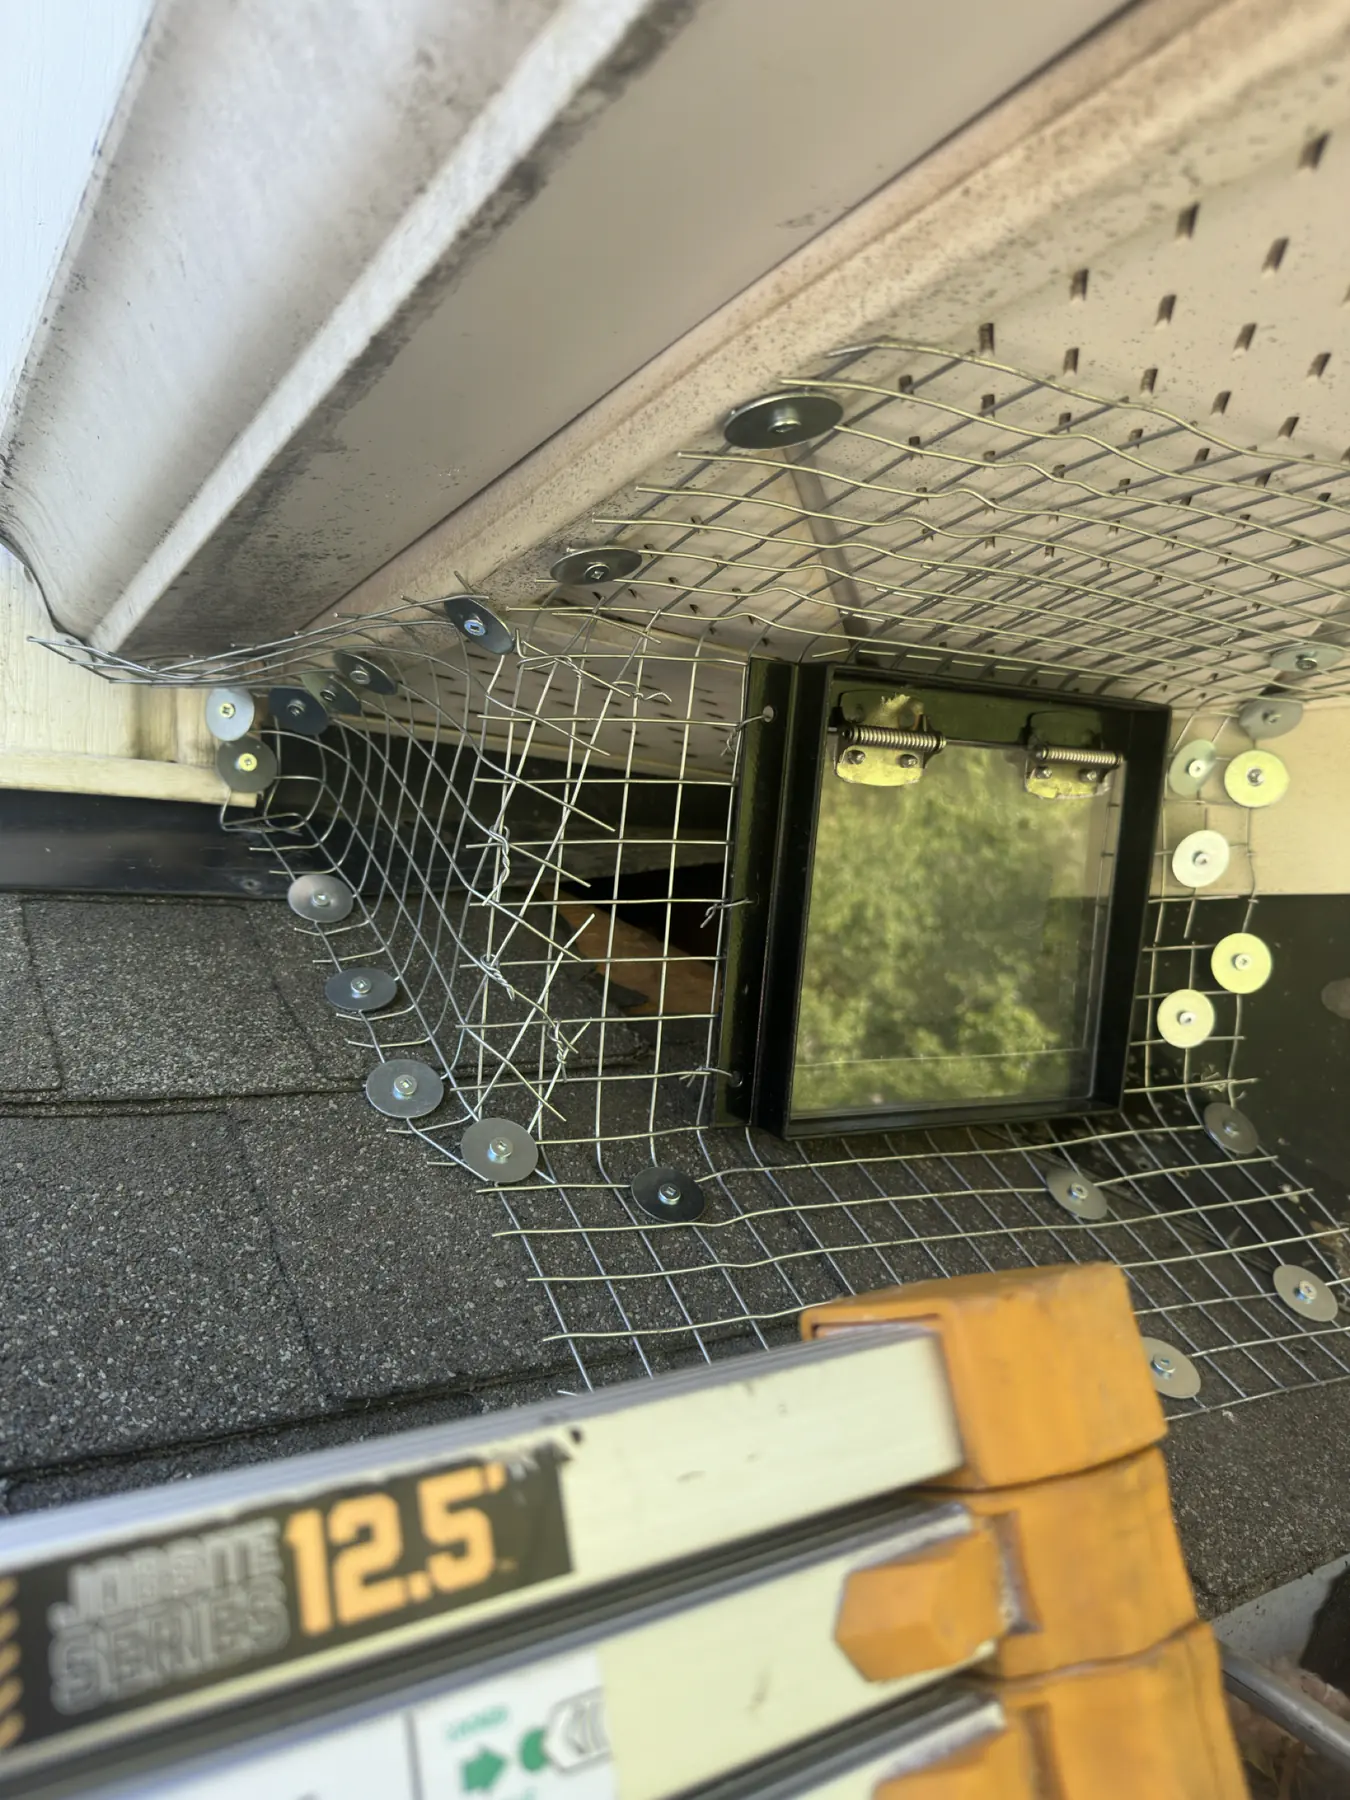
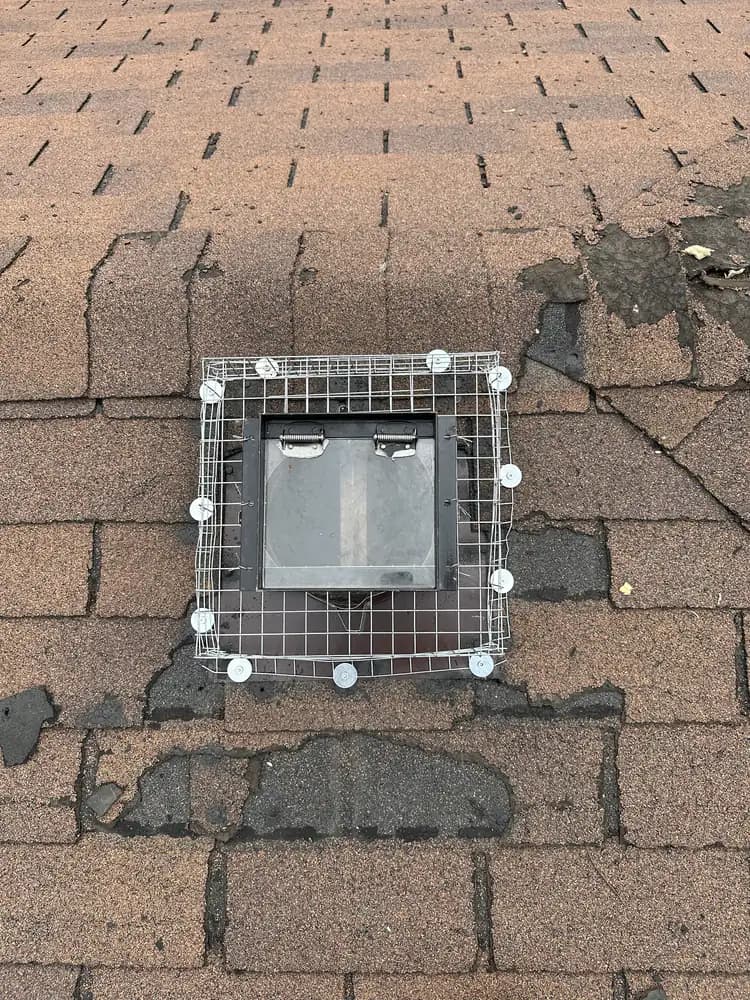
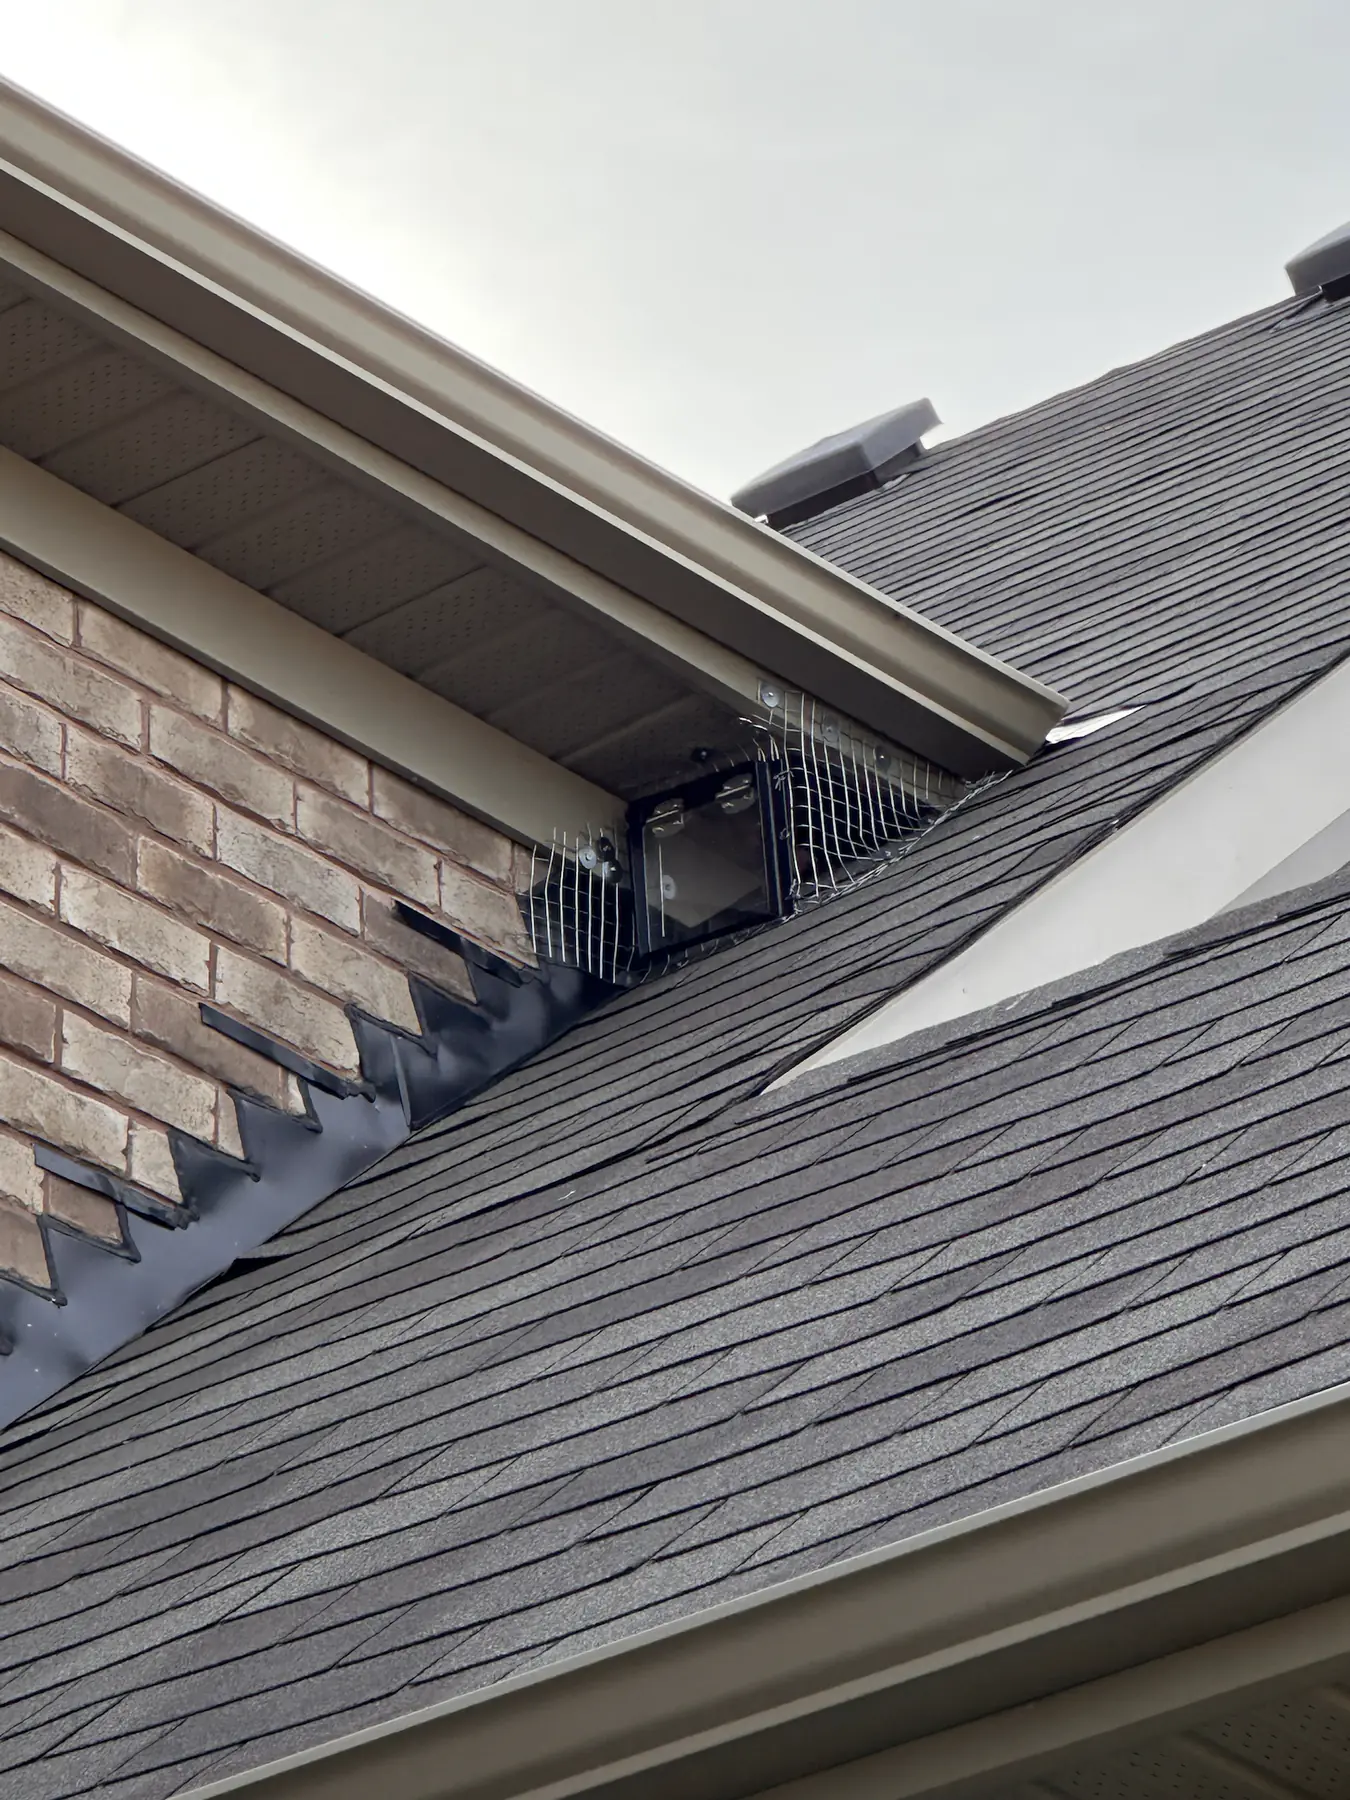
Wire one-way wildlife door secured around a square roof opening
A one-way door lets wildlife exit without returning through the opening.
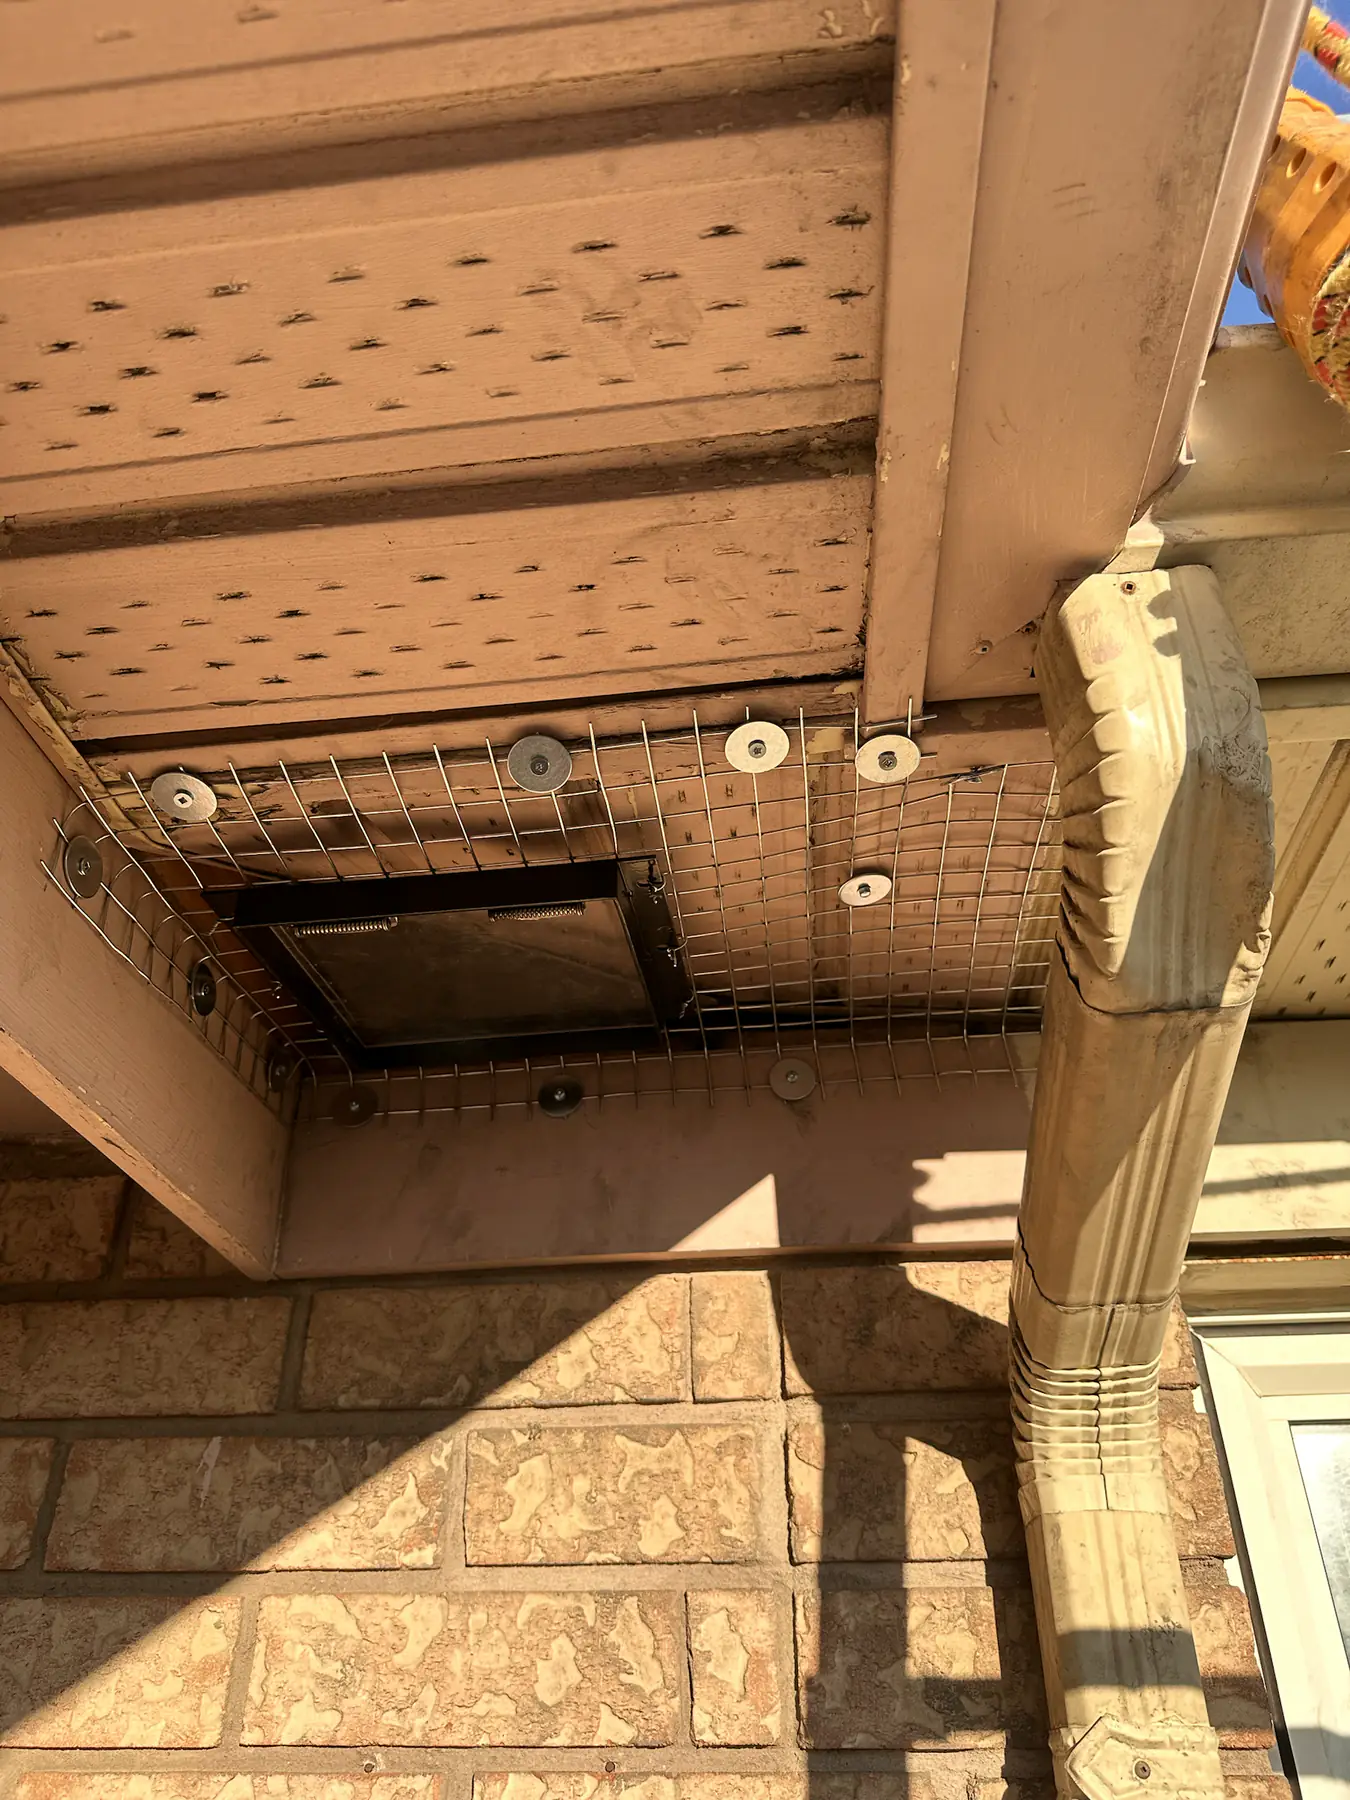
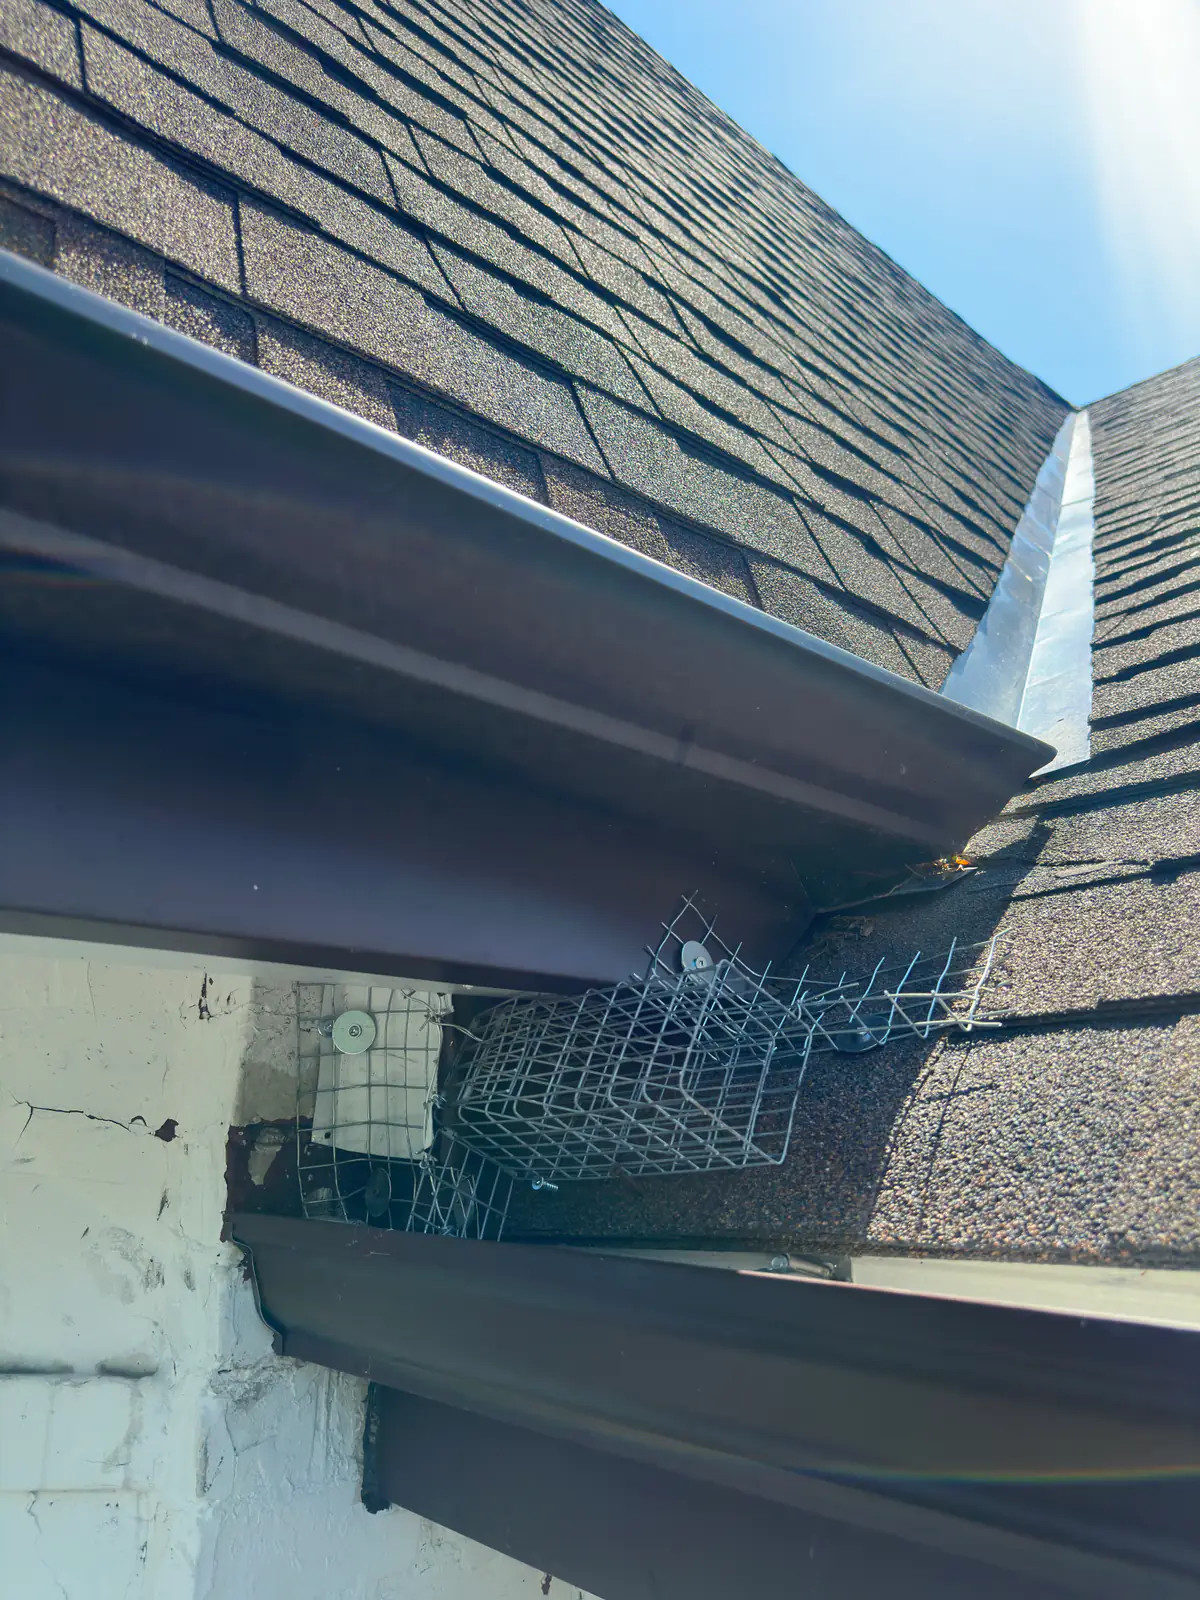
One-way wildlife exclusion device secured beneath an open eave cavity
A one-way exclusion detail beneath an eave.
Wire exclusion cage positioned over a square roof vent during installation
A roof-vent exclusion cage during installation.
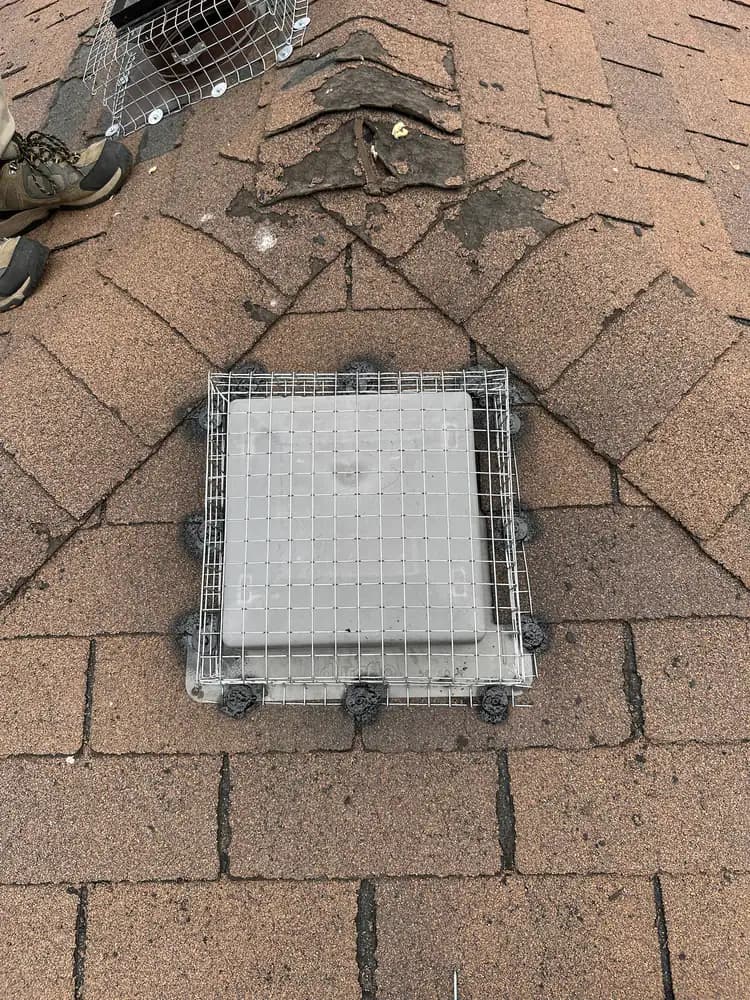
Finished wire wildlife-exclusion cage secured over a square roof vent
A completed roof-vent protection detail.
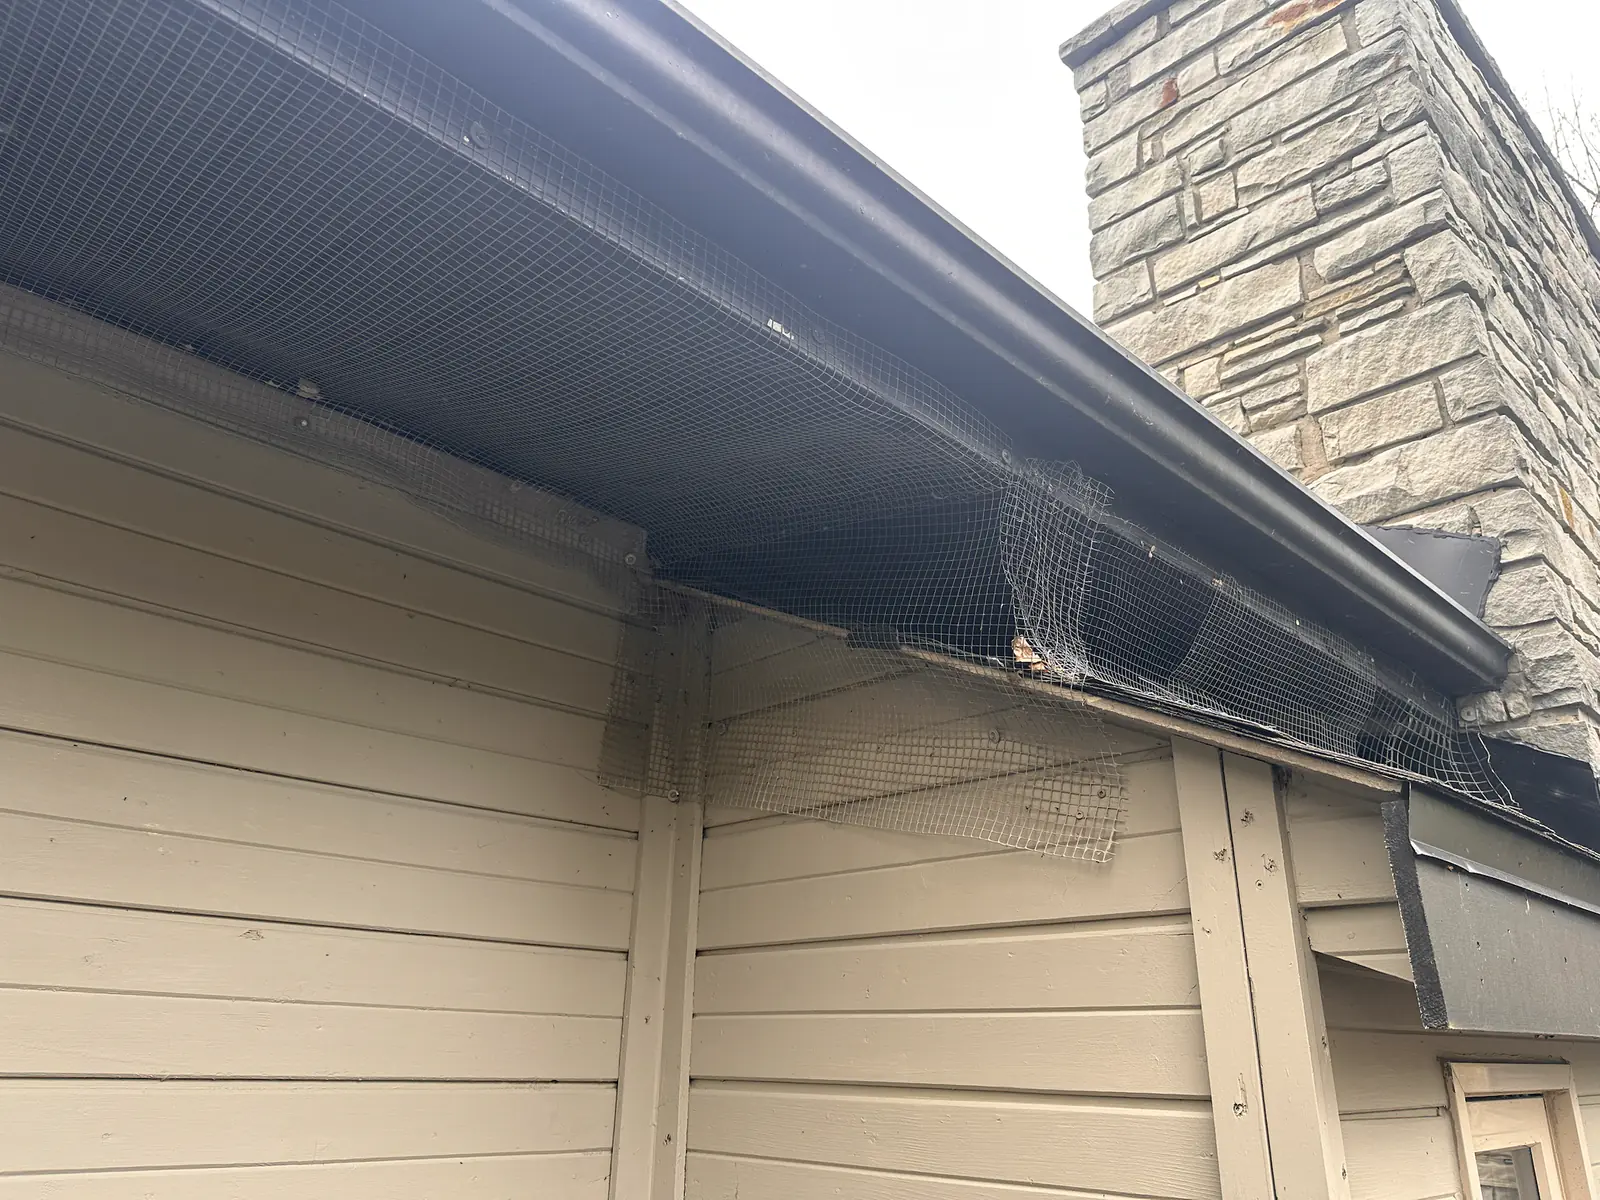
Long section of metal wildlife-exclusion mesh installed along residential eaves
Exclusion mesh fitted along the eaves.
Wire wildlife-exclusion cage installed beneath a roof edge beside brickwork
A durable cage installed below a roof edge.
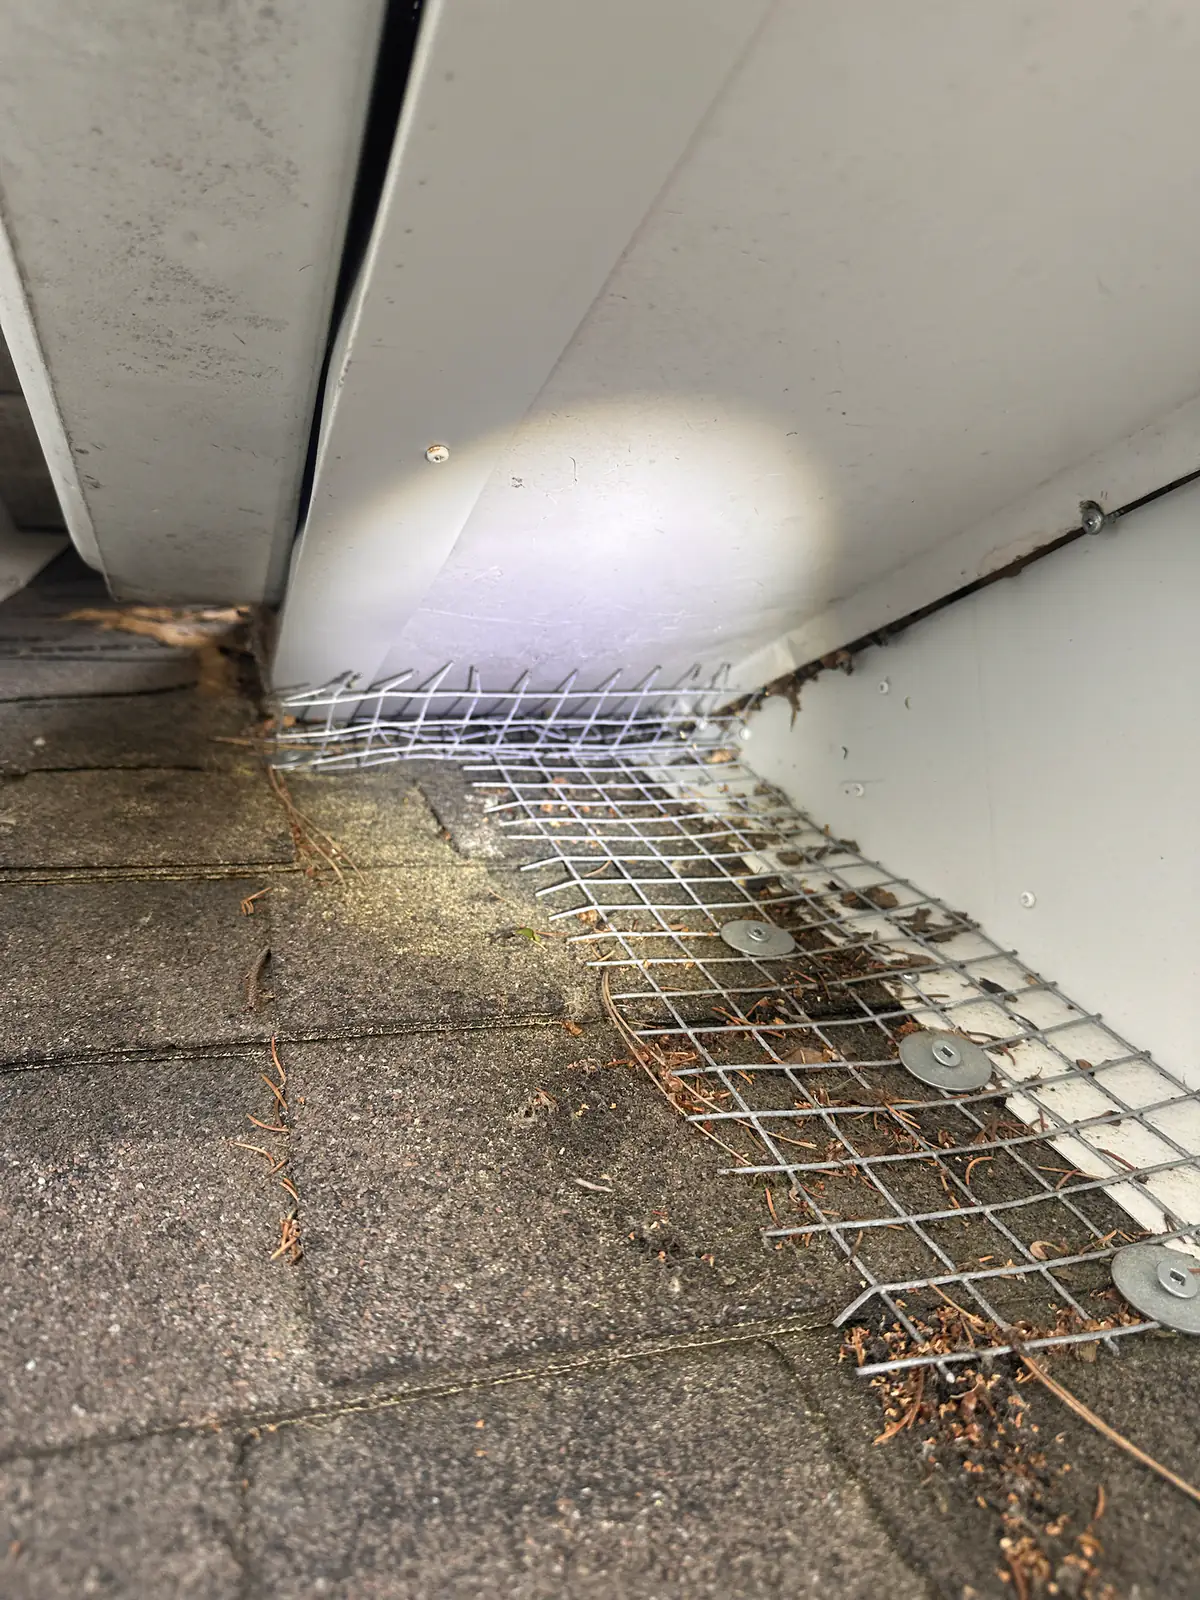
Metal wildlife-exclusion mesh fitted along a damaged roof edge above a gutter
Mesh closes a vulnerable roof-edge gap.
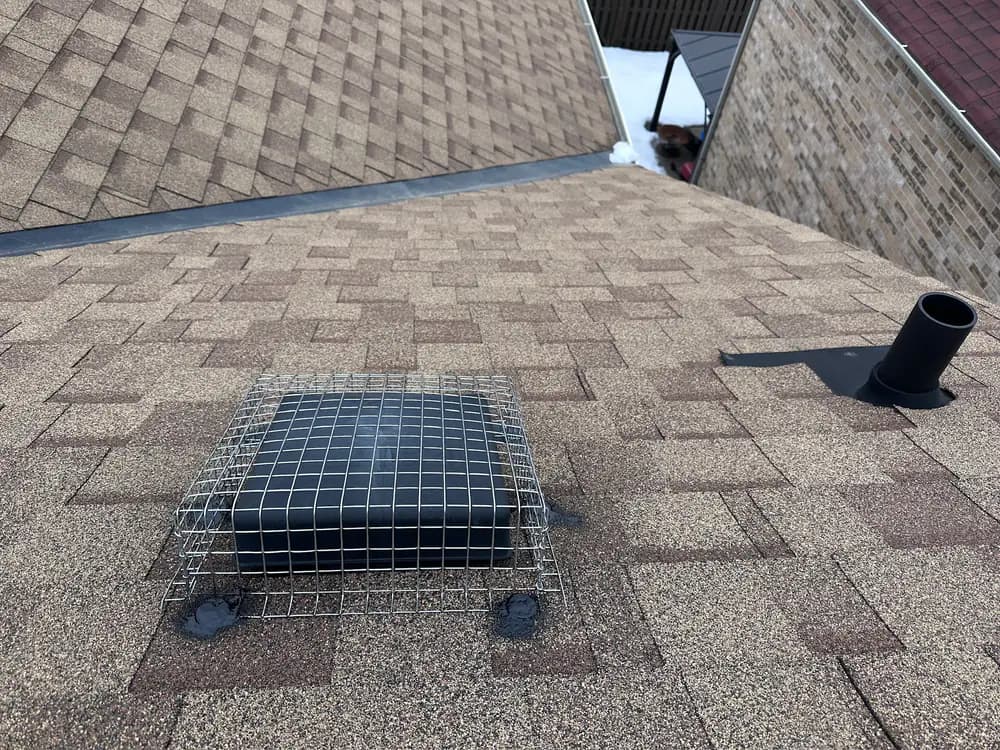
Black roof vent protected by a wire wildlife-exclusion cage on shingles
A finished wildlife-protected roof vent.
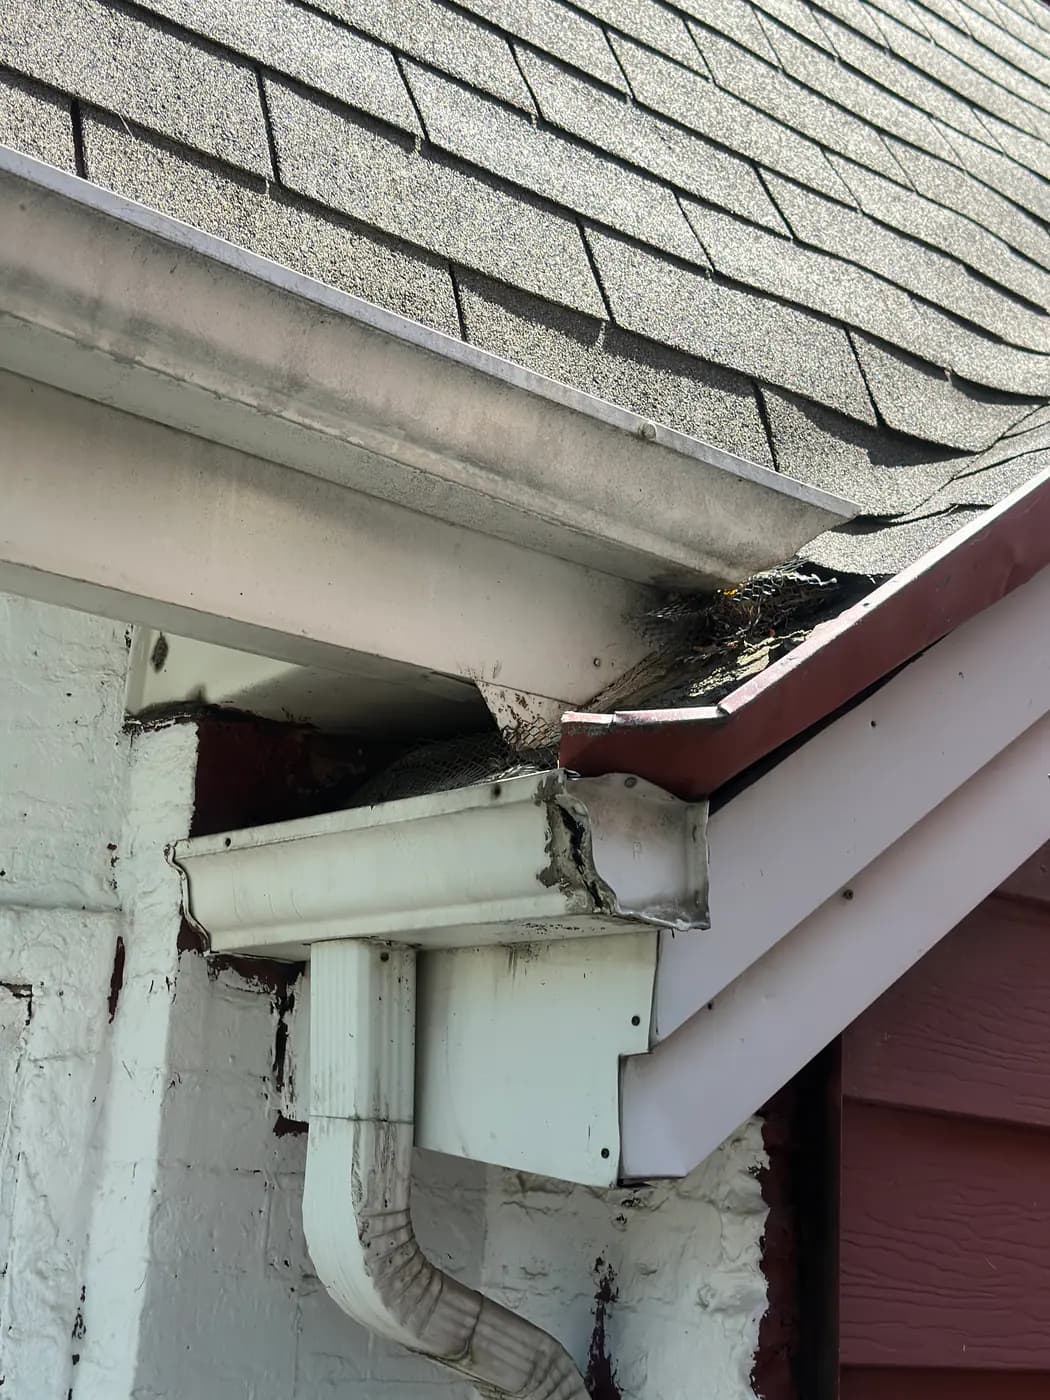
Missing soffit material and an open cavity beside a gutter and downspout
An exterior soffit opening requiring repair.
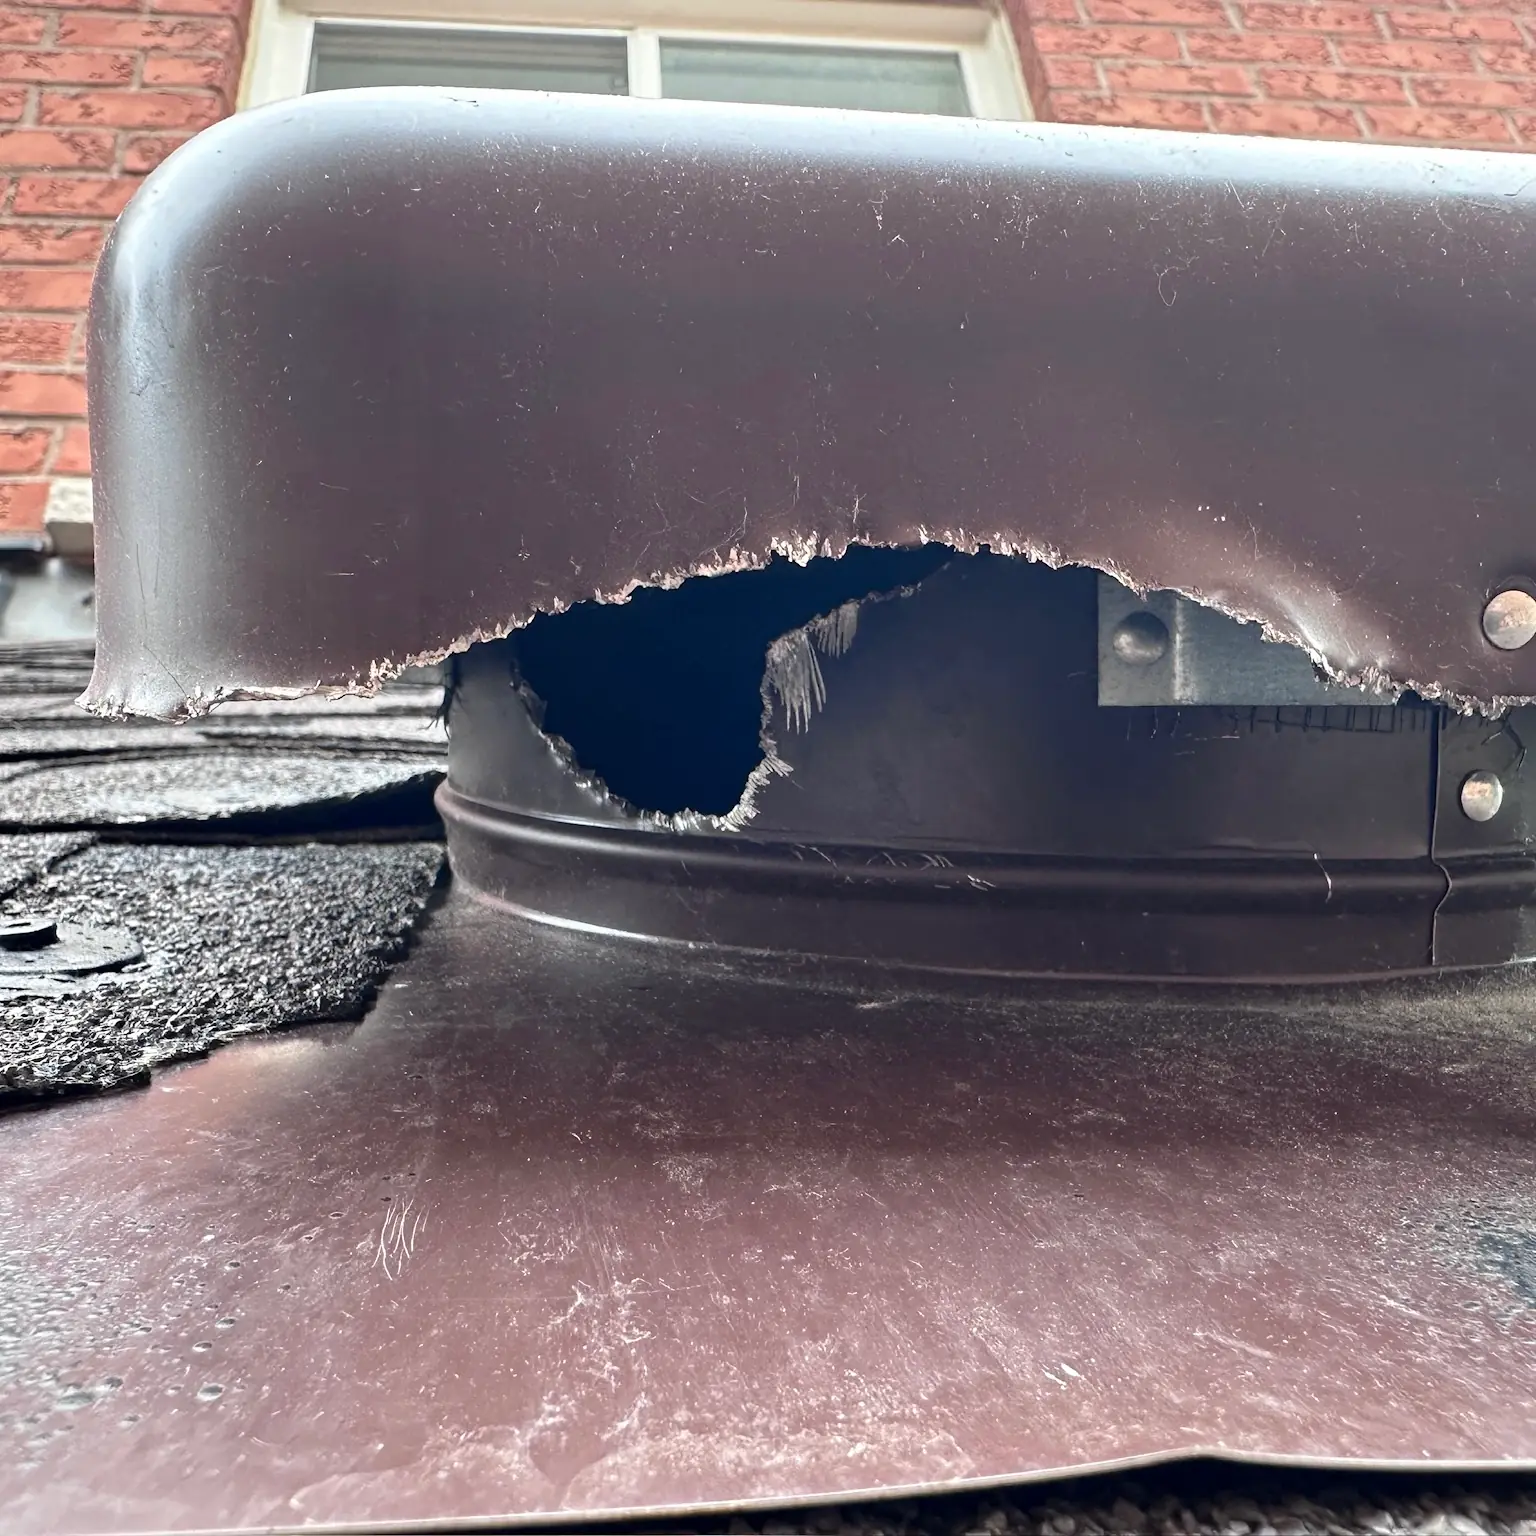
Roof vent cover with a large broken opening
A damaged vent cover can become an entry route.
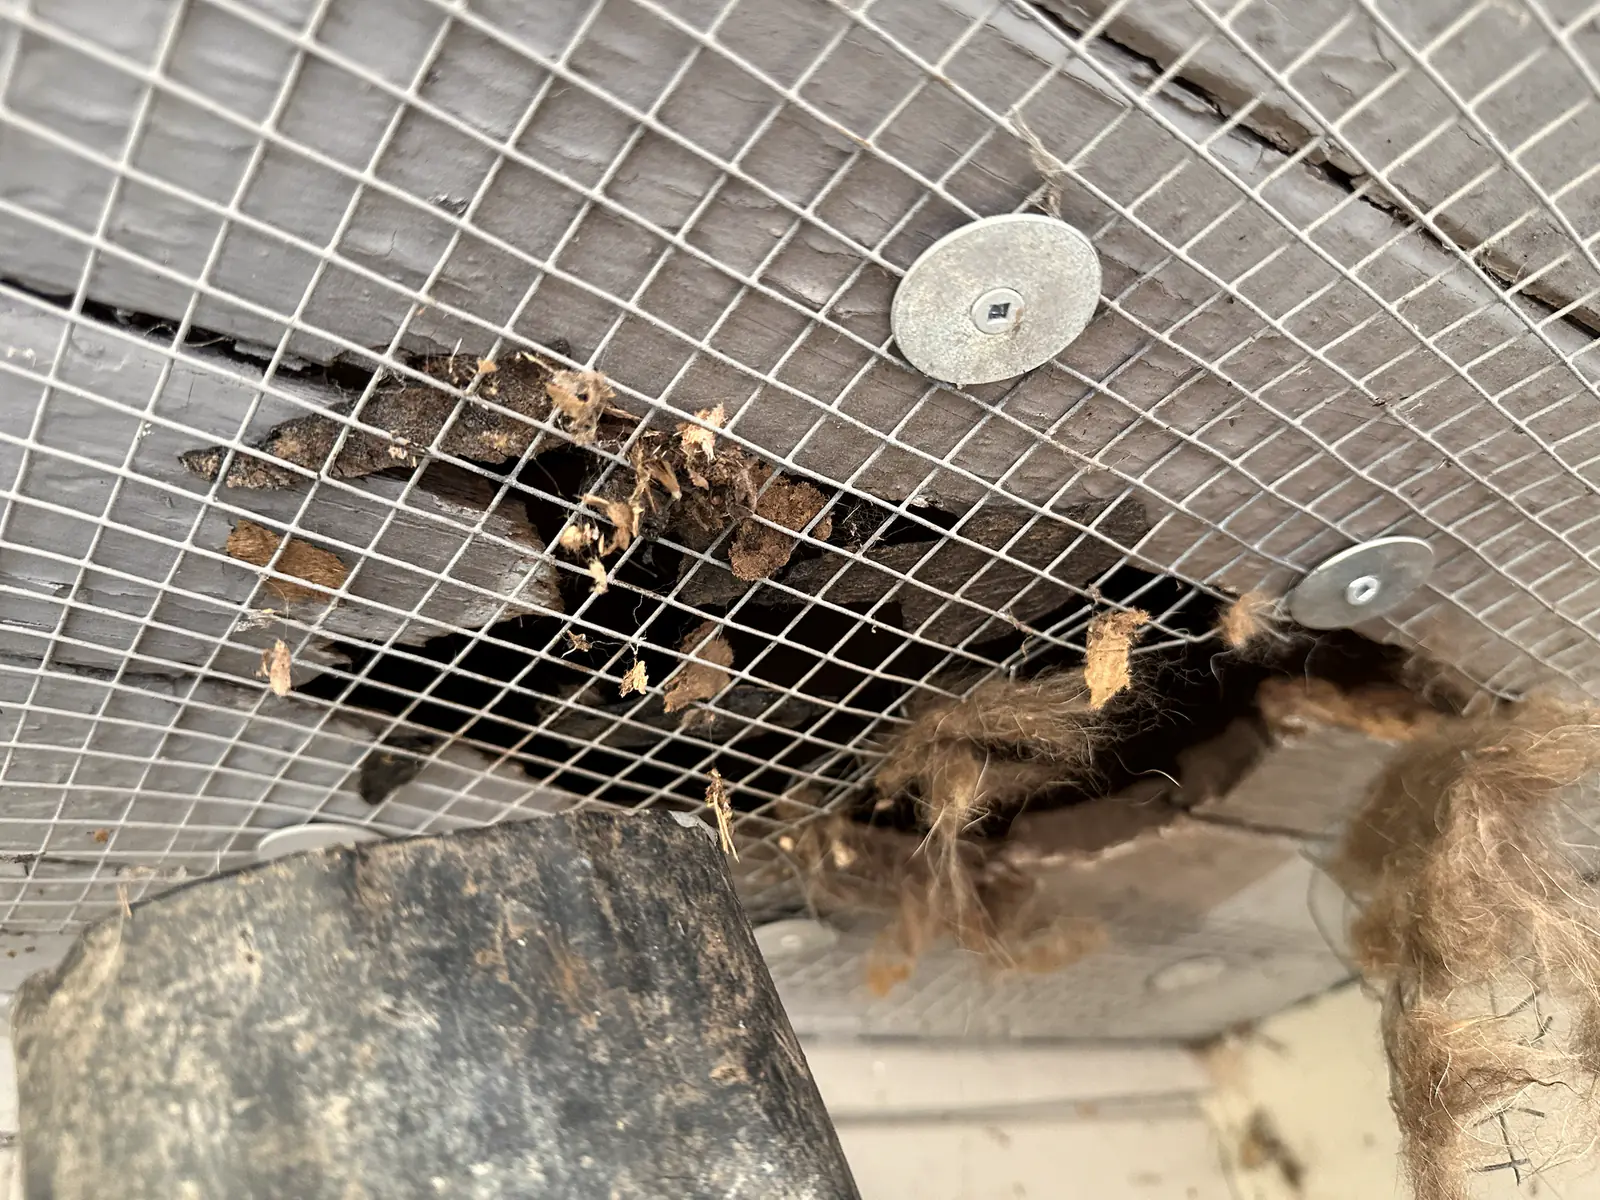
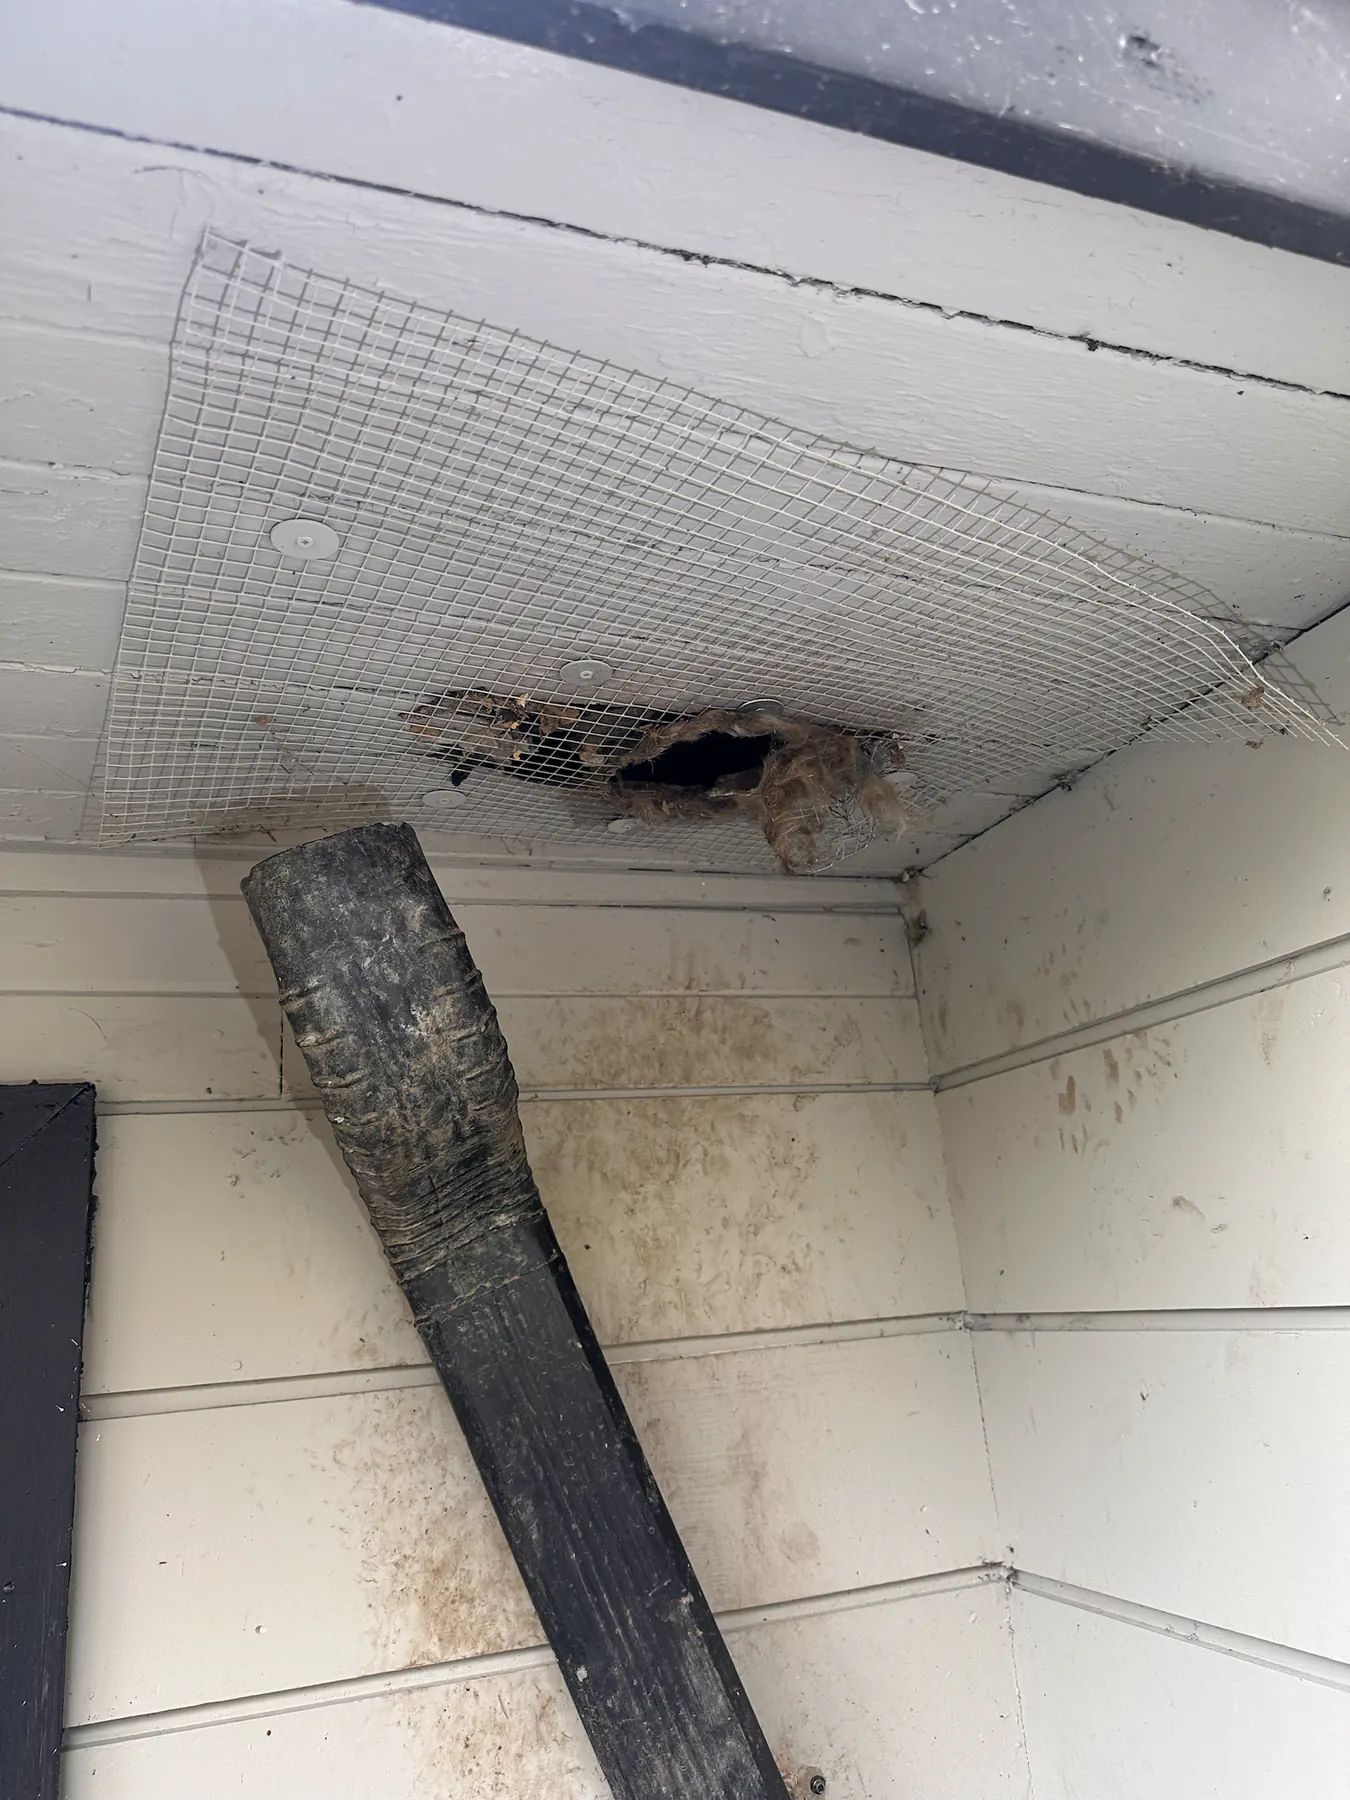
Damaged material and an opening behind roof exclusion mesh
Mesh is sized and fastened around the specific opening.
Roof vent cover with a broken opening along its lower edge
Roof-vent damage needs to be assessed before sealing.
Broken and deteriorated wood inside an opened roof cavity
Interior damage may be visible once access is opened.
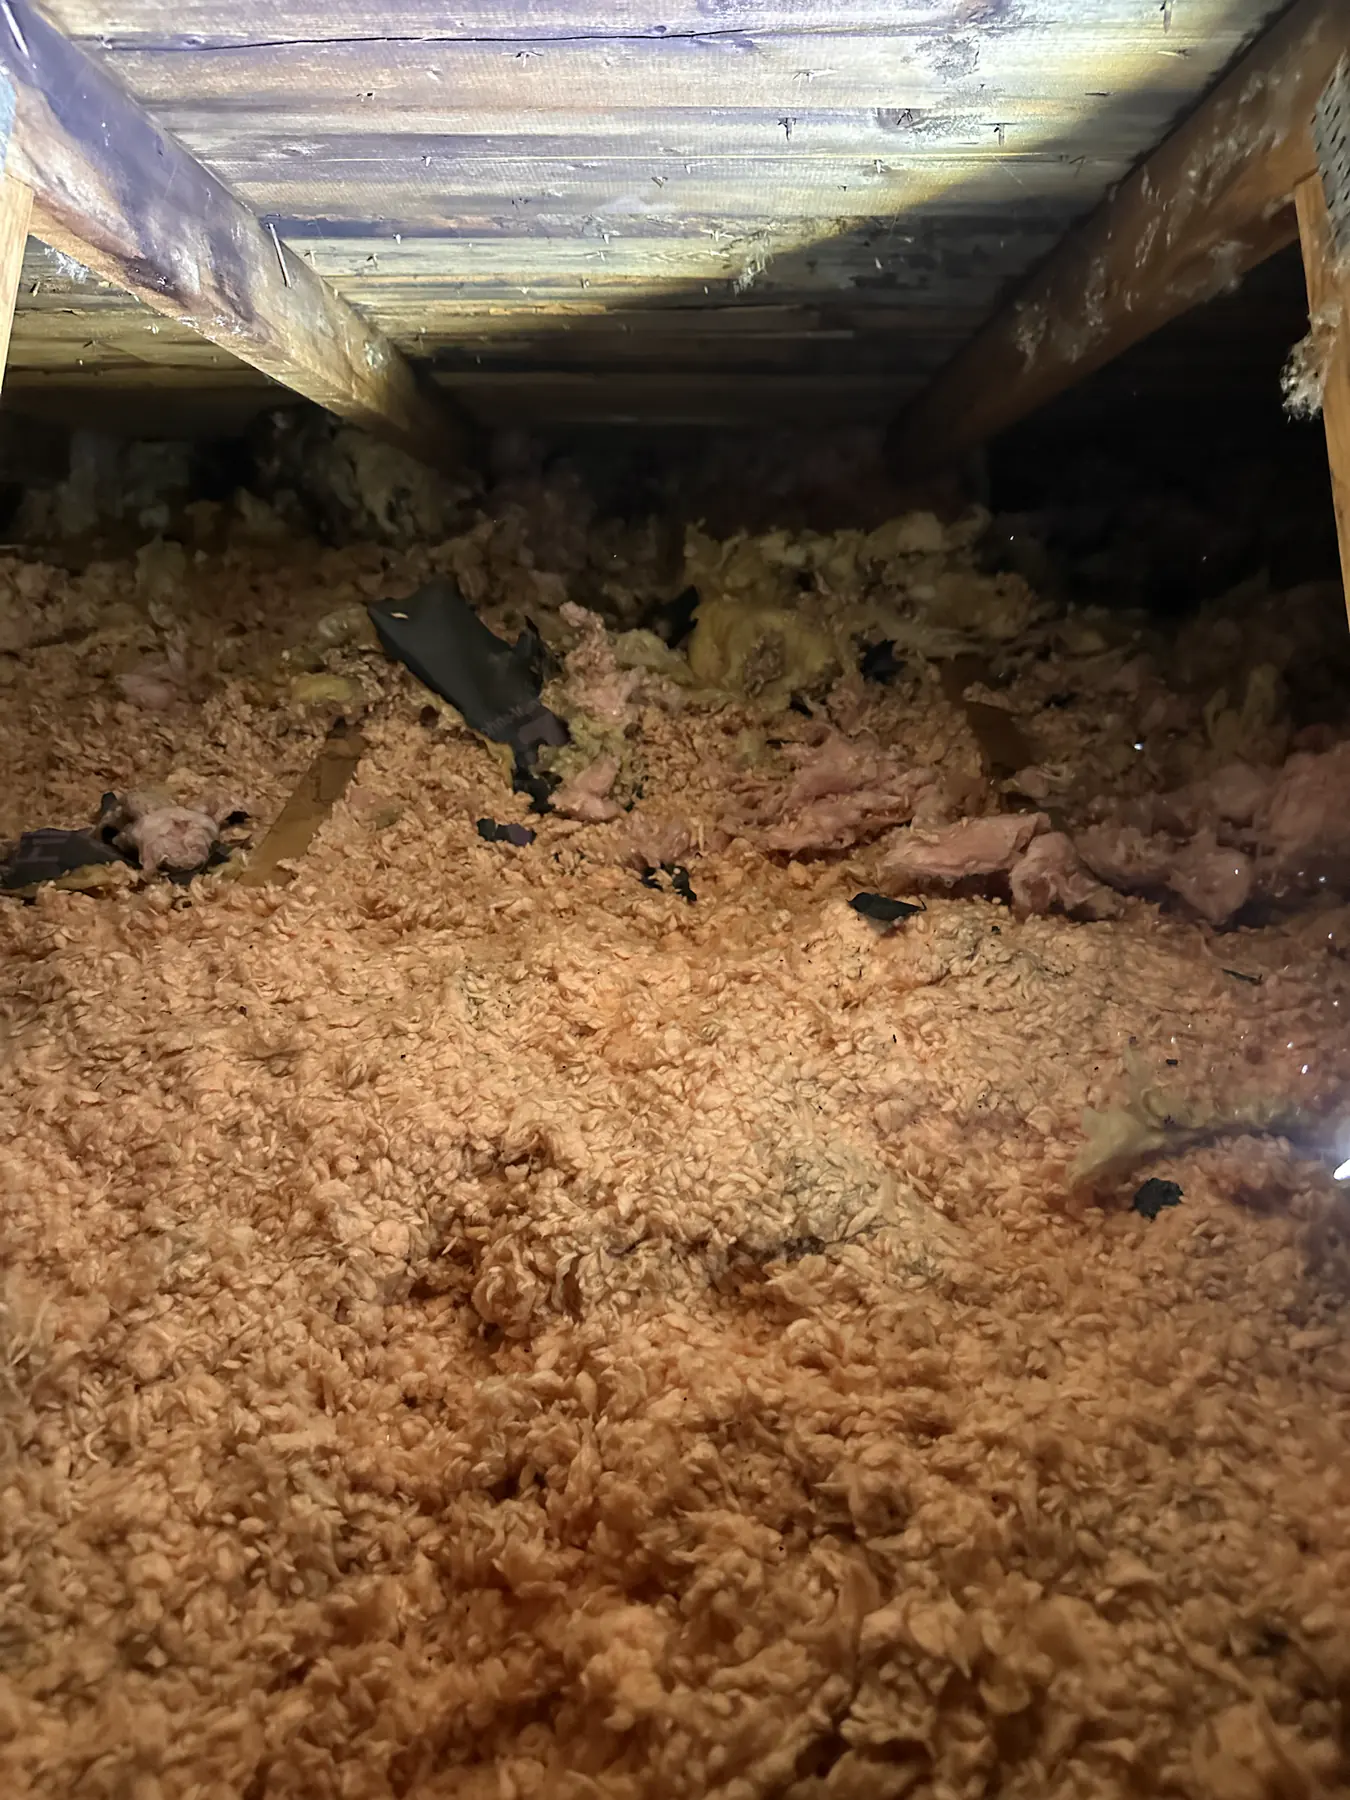
Disturbed attic insulation near a roof opening
Disturbed insulation can point to activity around an opening.
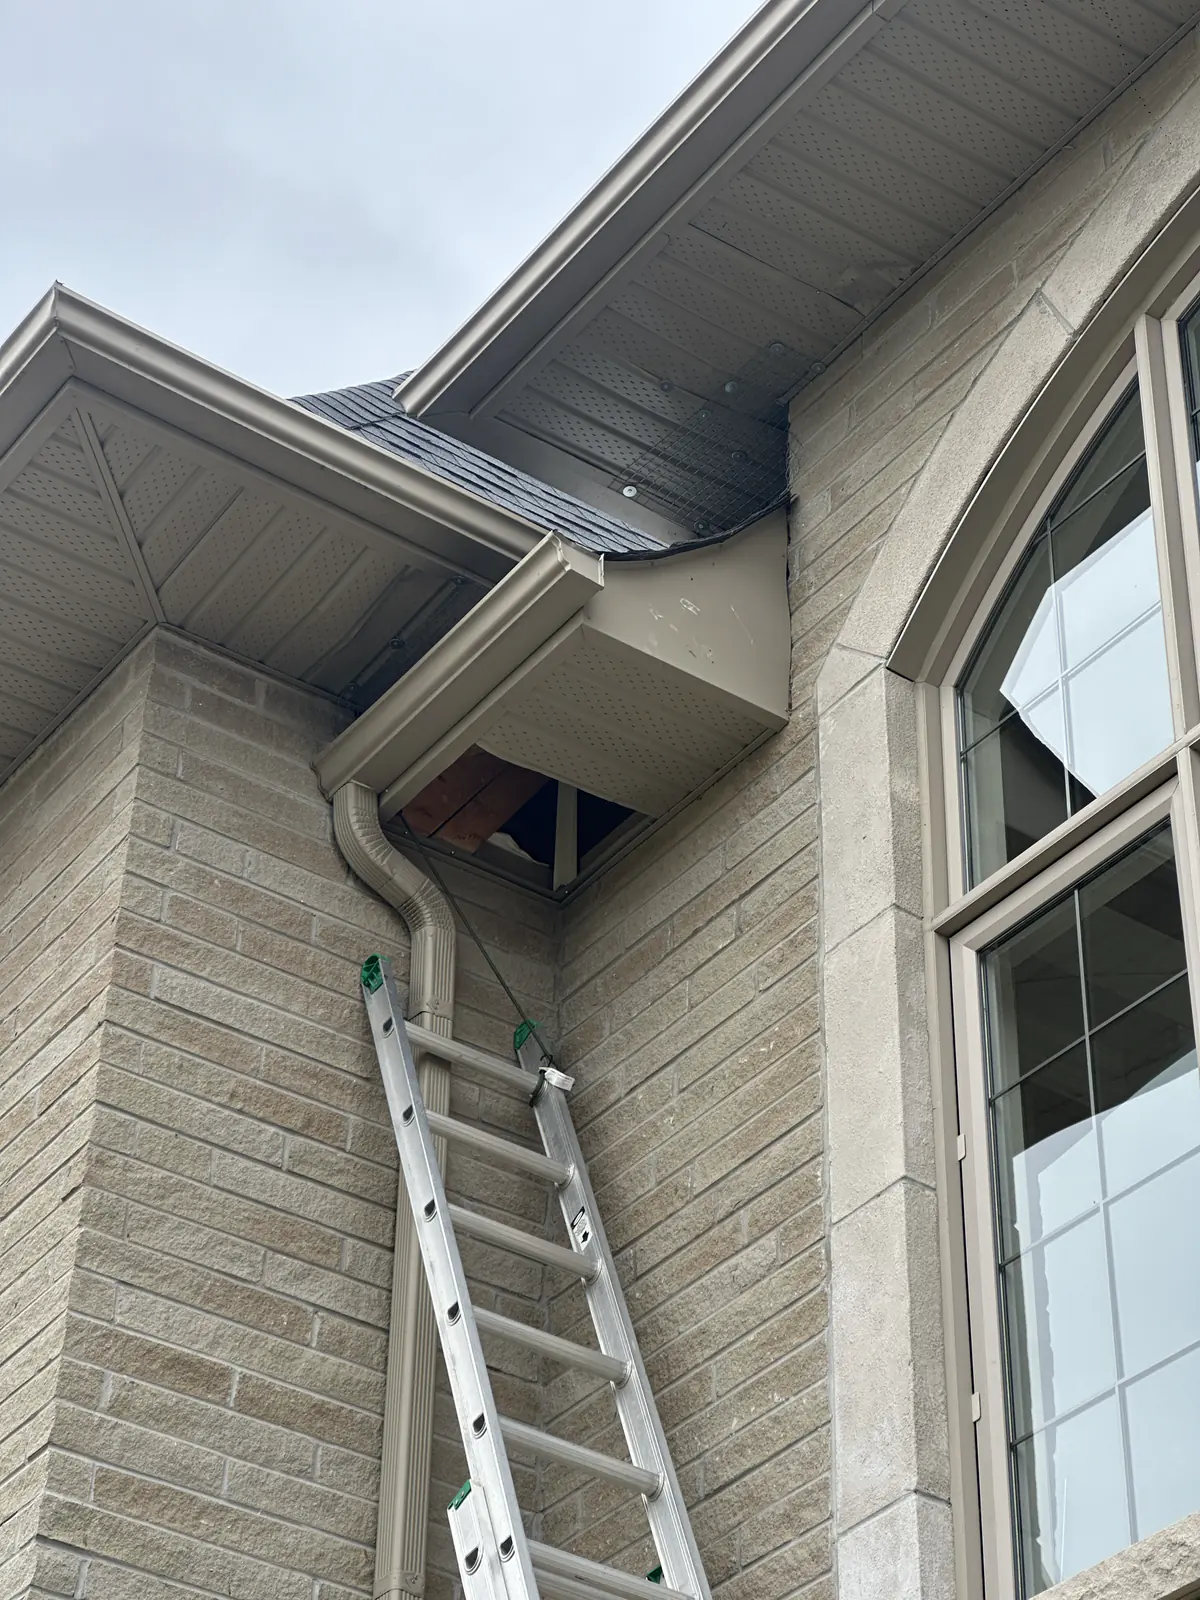
Extension ladder positioned below an open soffit cavity
Safe access is part of evaluating an upper roofline opening.
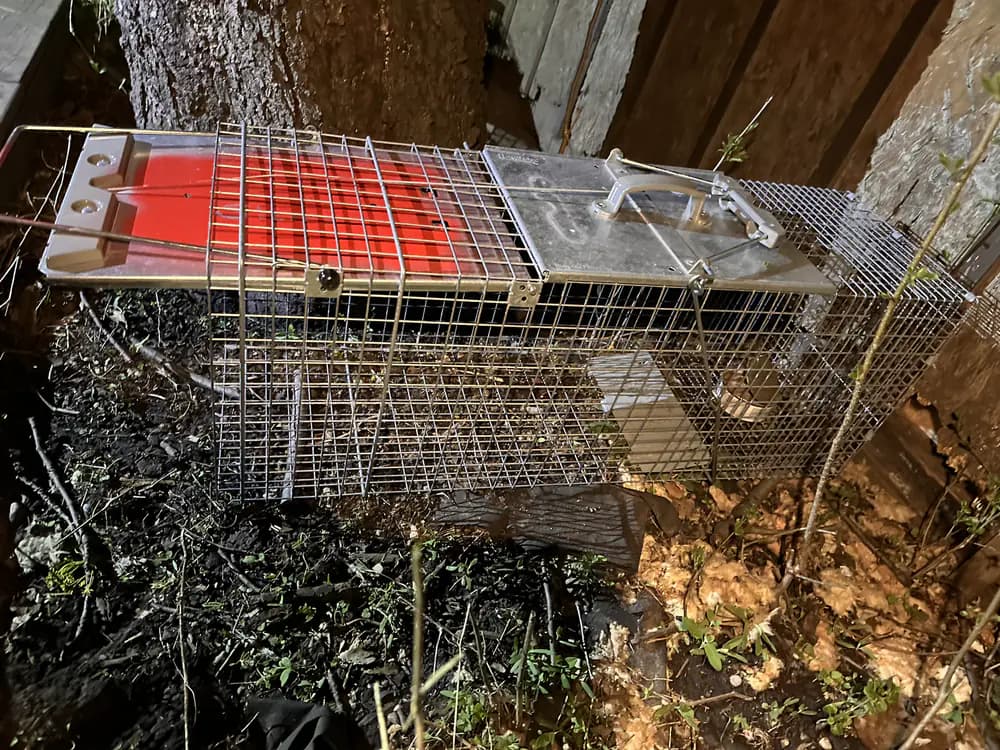
Empty wire live-capture wildlife trap positioned beside a tree trunk
Equipment choice follows the inspection and confirmed conditions.
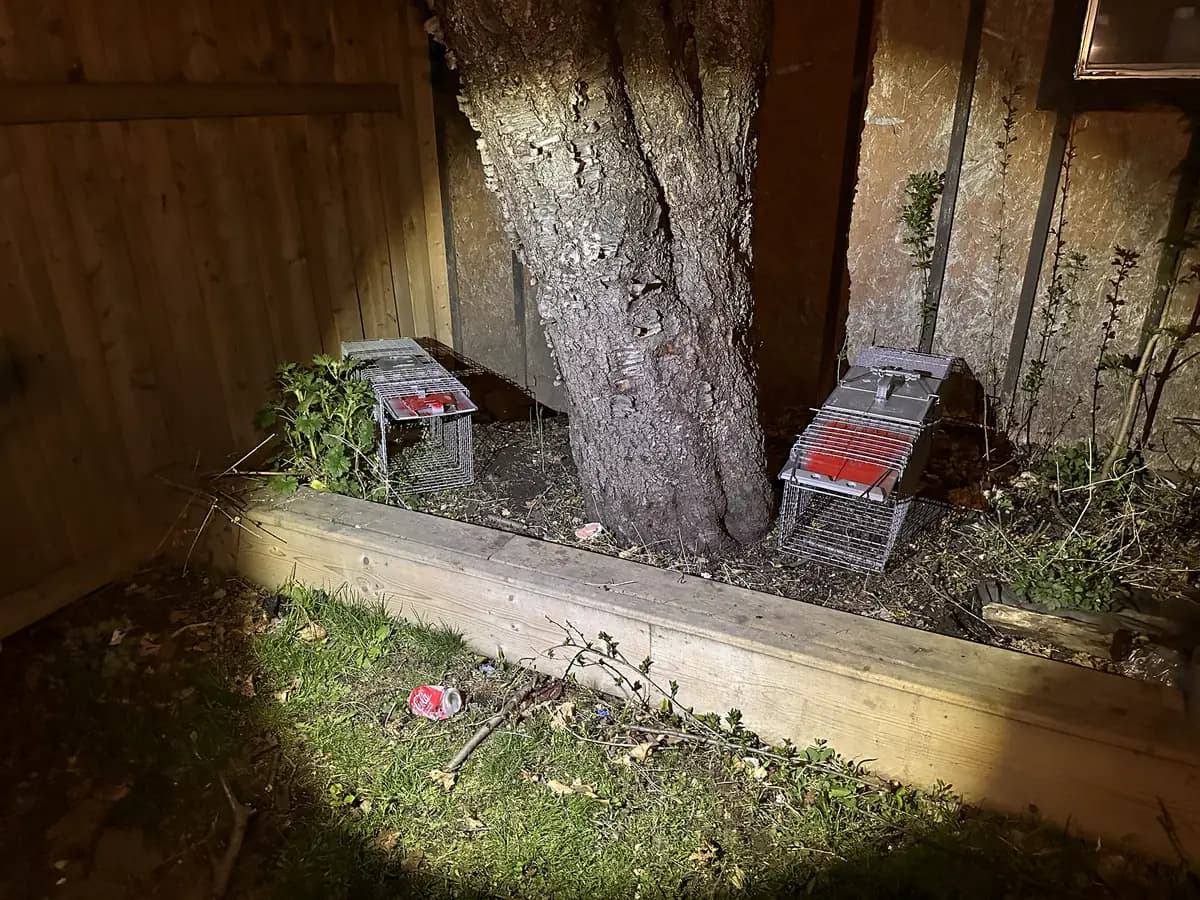
Two empty live-capture wildlife traps positioned beside a tree
Traps are one part of a site-specific wildlife plan when appropriate.
Rectangular opening cut into a low-slope roof deck
A roof-deck opening requires a durable repair plan.
Open section at the roof edge above a gutter and brick wall
An exposed roof edge beside a gutter.
Open soffit cavity with a board positioned beneath the entry gap
An active opening is documented before its final repair.
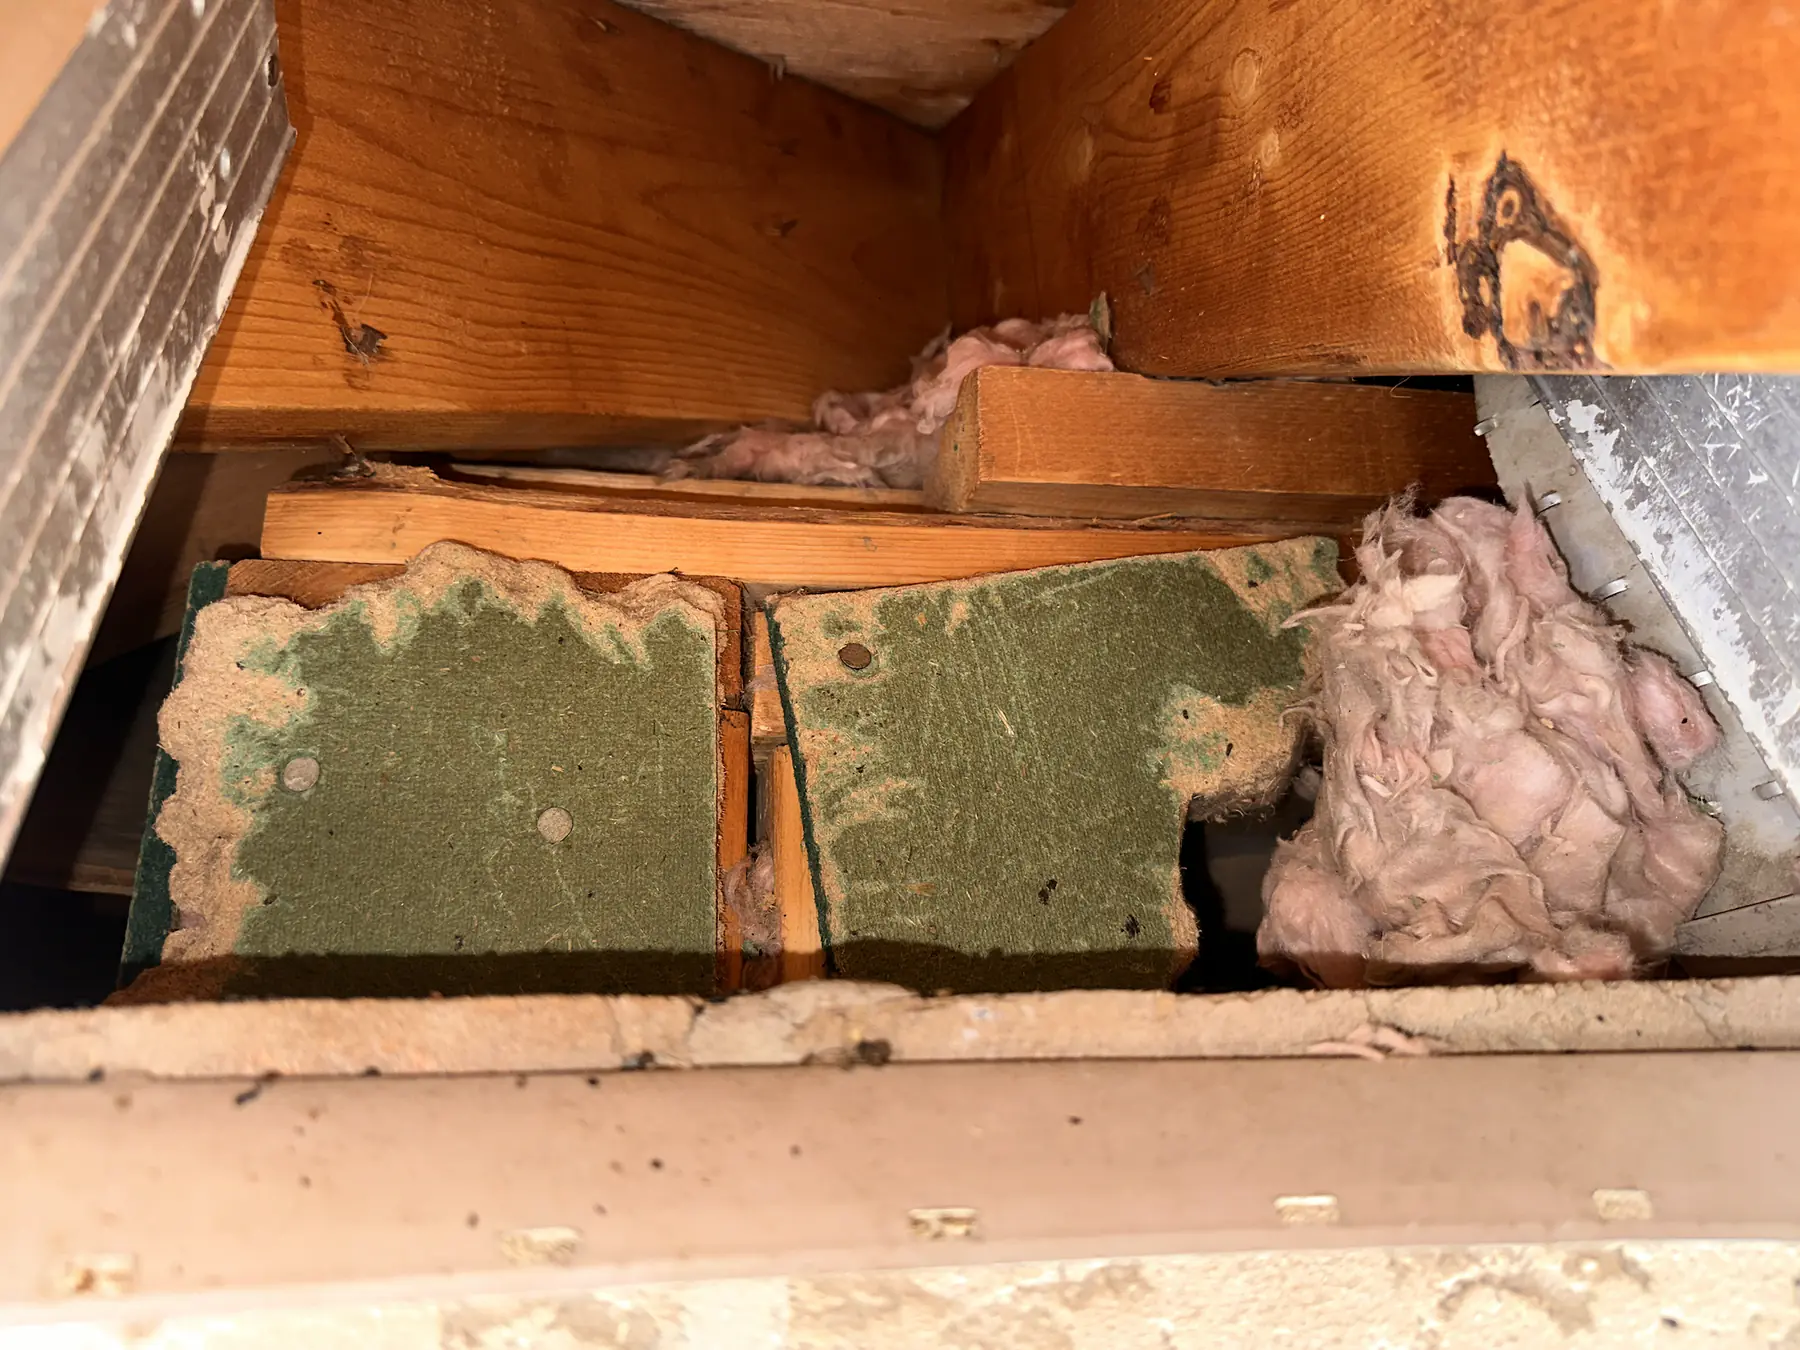
Exposed insulation boards and a dark opening inside a roof cavity
Interior roof-cavity access helps show the full scope.
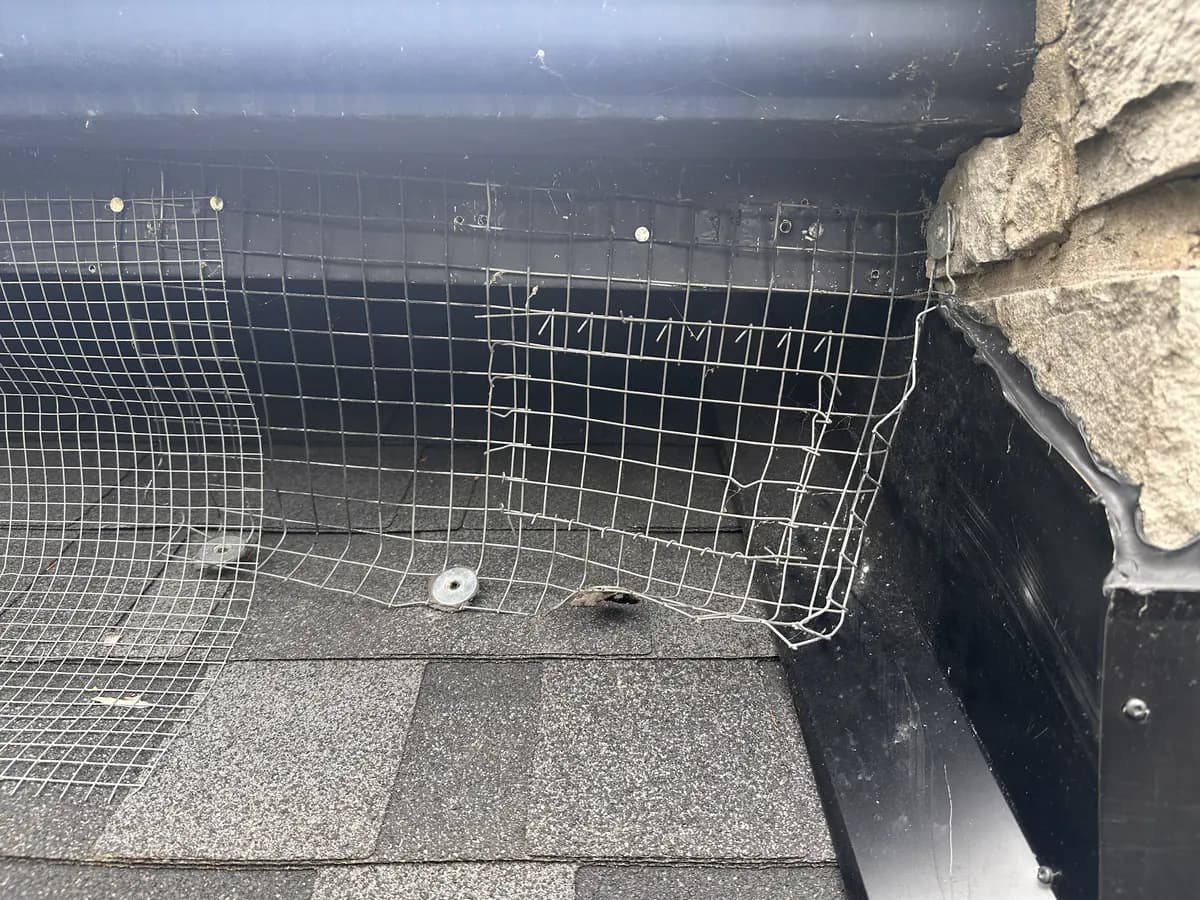
Wire exclusion mesh secured around a roof corner beside stone cladding
Mesh is formed around roof corners and changes in material.
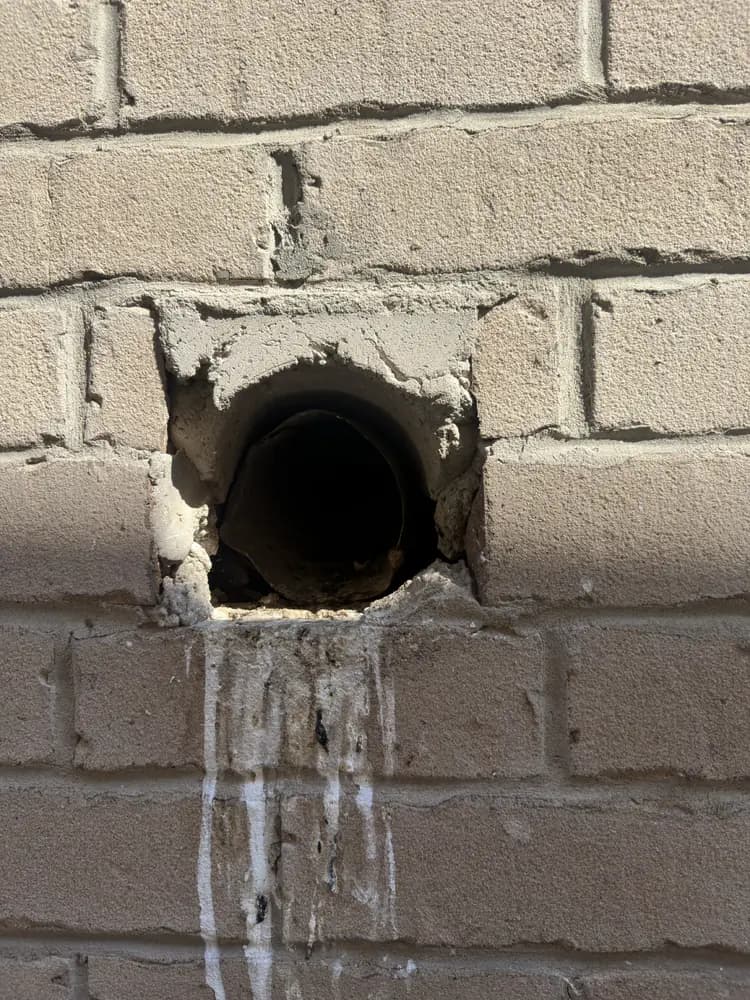
Round unsealed vent opening cut through an exterior brick wall
Wall vents and penetrations are checked as potential routes.
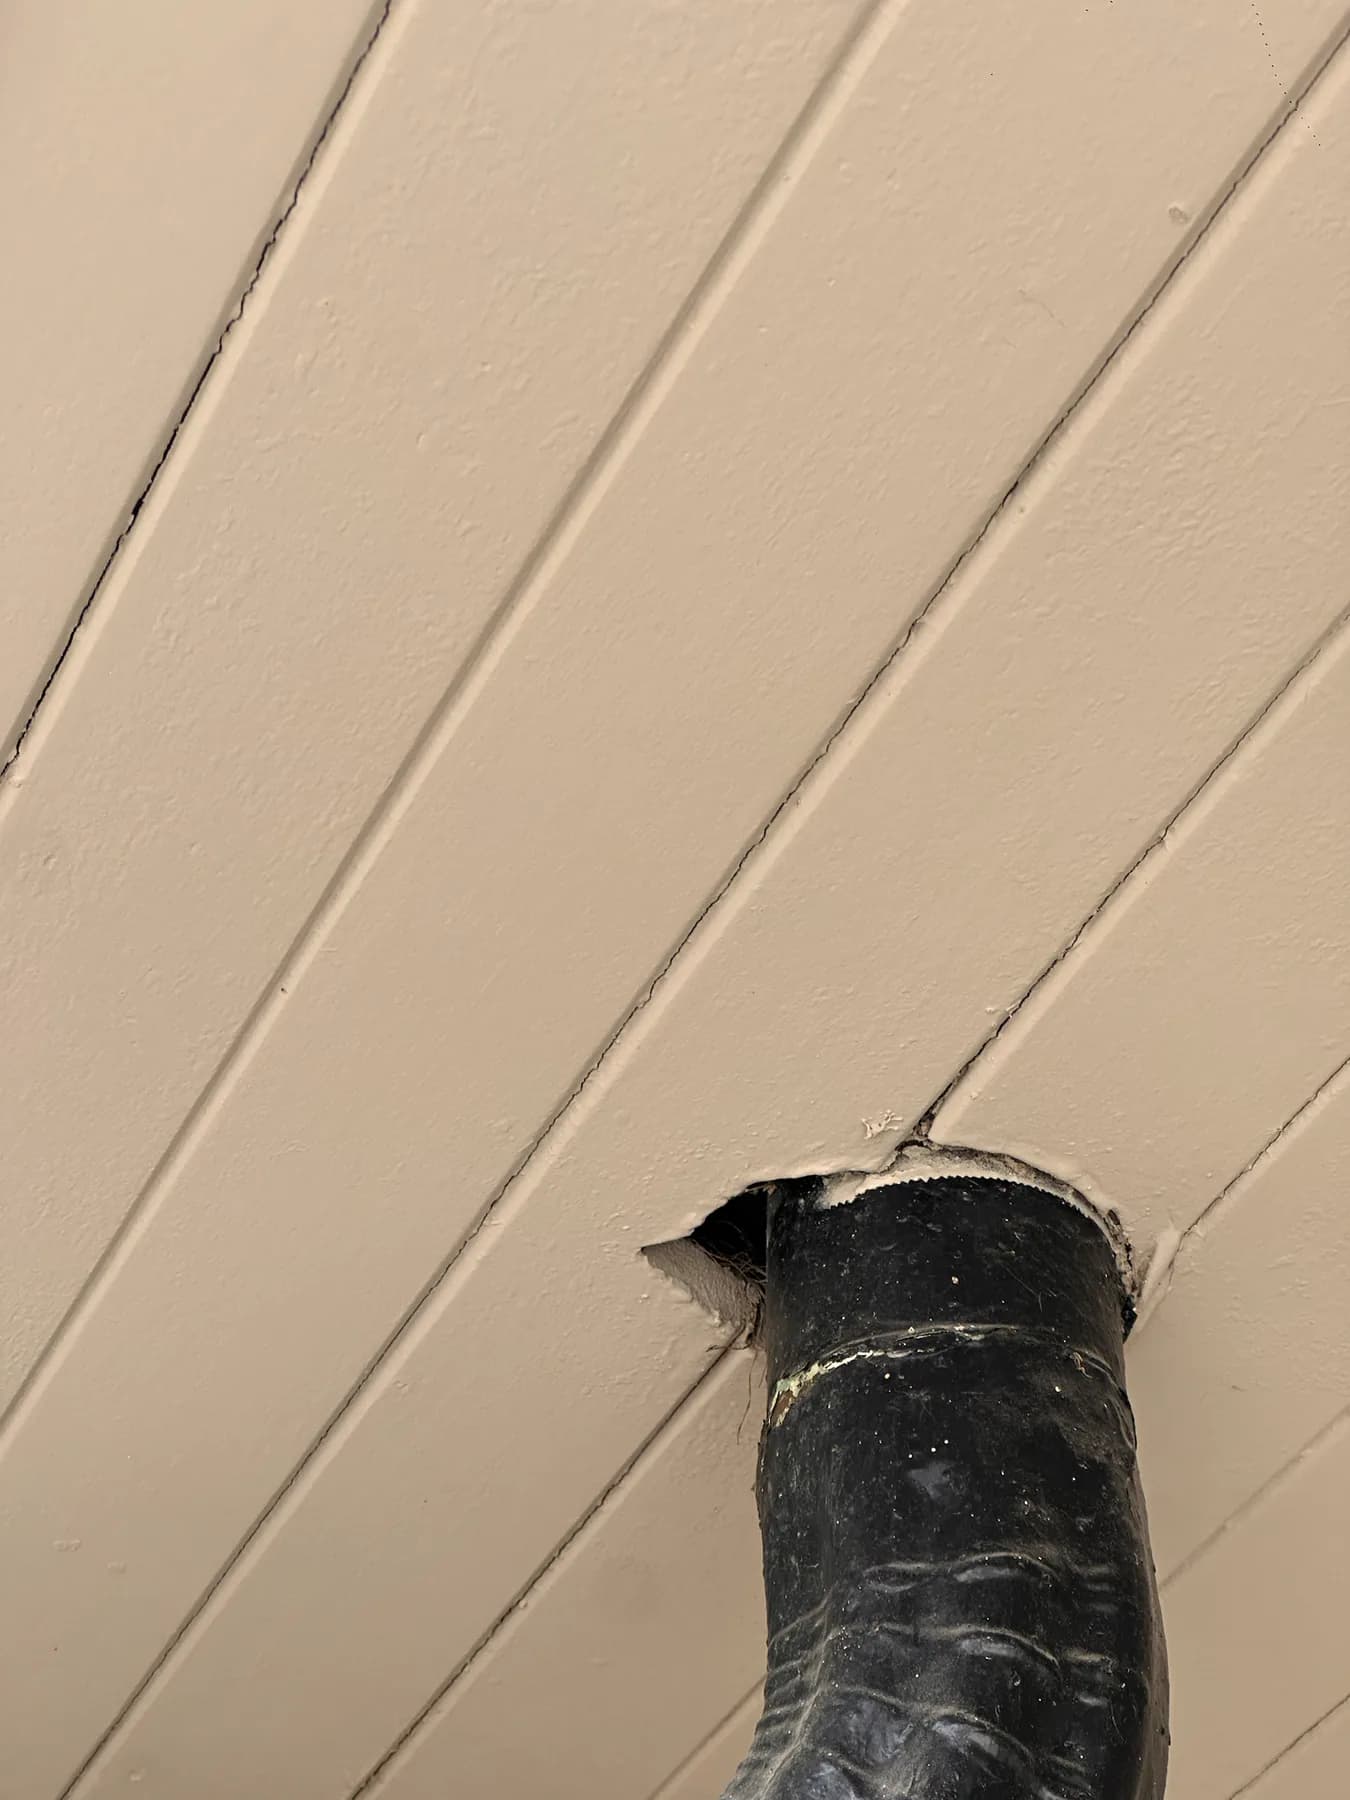
Black vent pipe passing through a ceiling opening without a visible perimeter seal
Pipe penetrations can need a tailored exclusion detail.
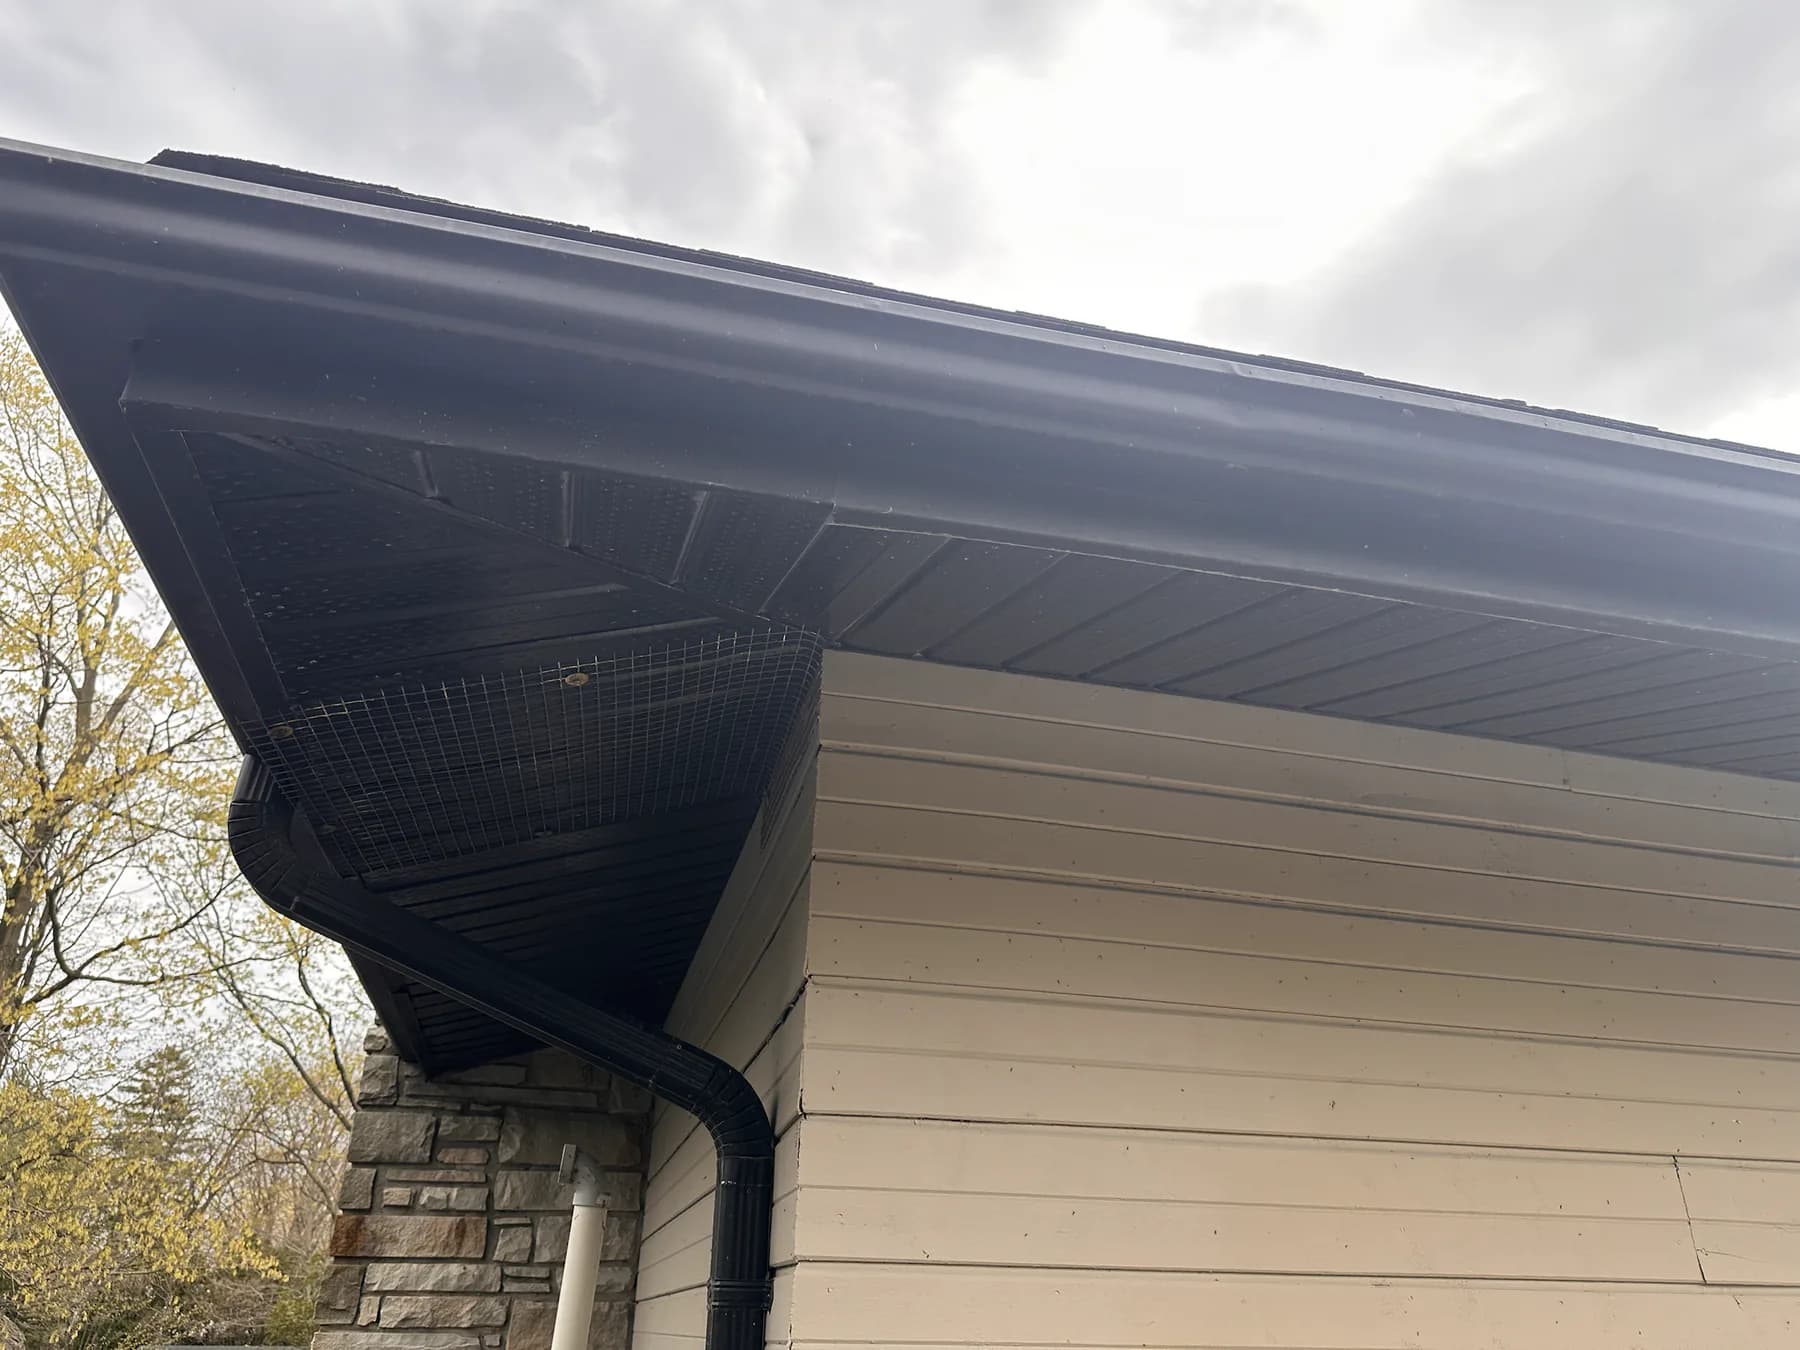
Metal wildlife-exclusion mesh fitted beneath eaves around a downspout
Exclusion mesh formed around a downspout at the eaves.
Metal wildlife-exclusion mesh installed beneath the roofline beside a brick wall
A completed exclusion detail under a roofline.
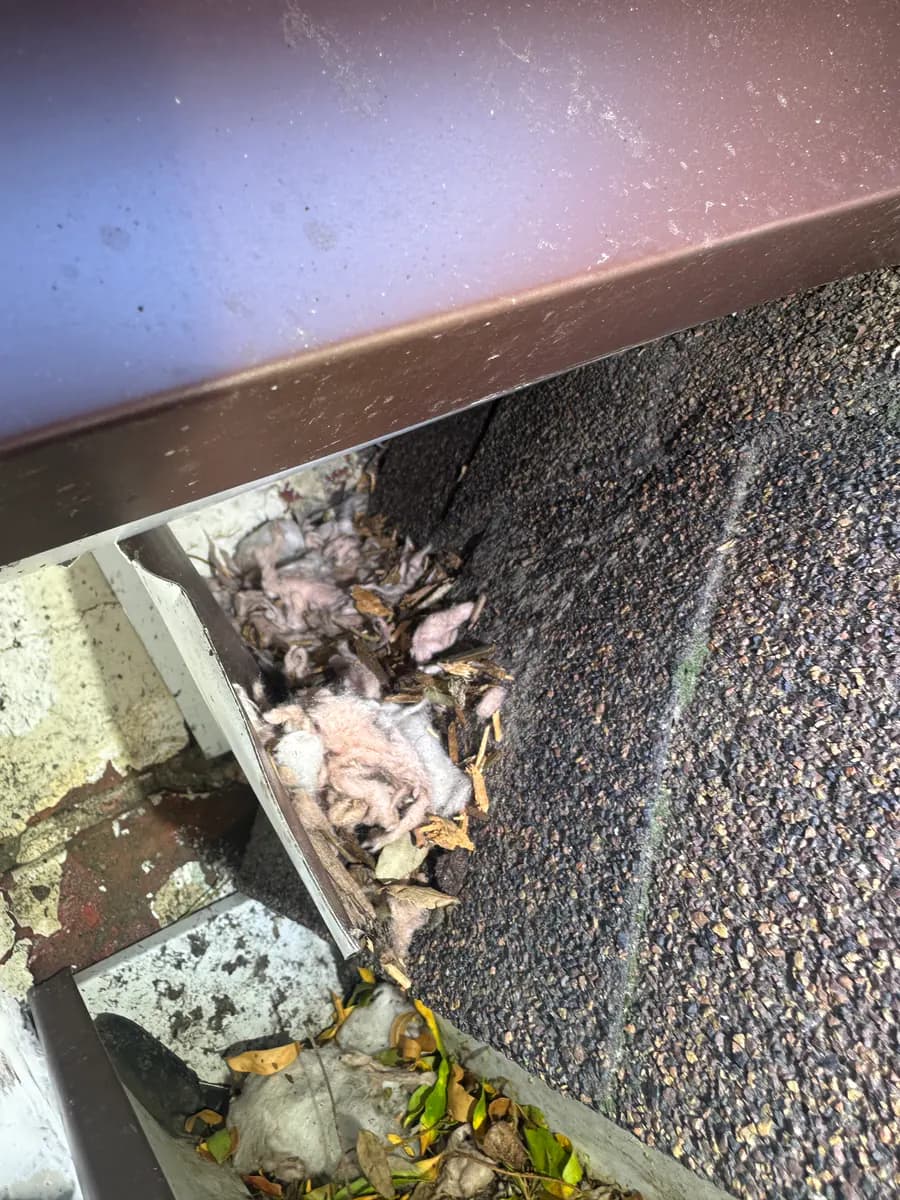
Insulation, fur-like material, leaves, and debris collected inside a roof gutter
Gutter debris can be a useful clue during an exterior inspection.
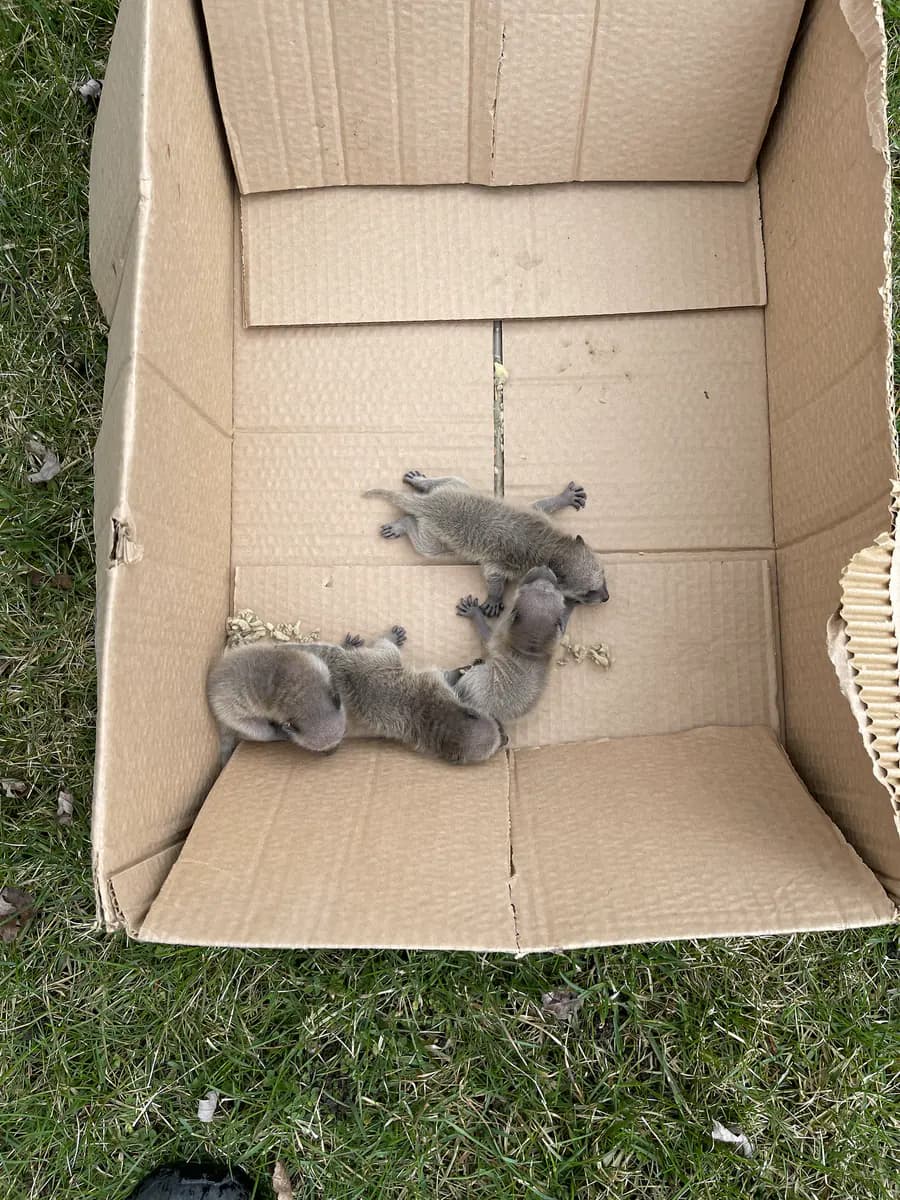
Several baby squirrels resting together inside a cardboard box outdoors
Young wildlife calls require an adjusted, humane service plan.
Step by step

A practical wildlife removal process for GTA homes and buildings.

01

Inspection and entry-point diagnosis

The first step is finding how the animal got in. We inspect vents, soffits, fascia boards, roof edges, chimneys, pipe penetrations, attic spaces, droppings, nesting material, and fresh damage.

  • Confirm the likely animal before setting the plan
  • Map active and secondary entry points
  • Check roofline damage, vent gaps, and attic signs
02

Technology-assisted checks

When needed, we use capability-based tools such as endoscopic cameras, thermal checks, drone-assisted roof review, ladders, and close visual inspection to reduce guesswork.

  • Endoscopic checks for tight voids and vent runs
  • Thermal checks when hidden activity needs confirmation
  • Drone review where roof access needs a safer first look
03

Humane removal and exclusion plan

For raccoons and squirrels, the common plan is a one-way door over the active opening. The animal can leave naturally but cannot come back through the same gap.

  • One-way doors for common raccoon and squirrel entries
  • Bird nest removal, debris vacuuming, and optional wire-mesh vent protection
  • Bat work quoted after inspection and entry-point review
04

Baby-season handling

Spring and early summer are common periods for young animals. If babies are present, they may need manual removal before the exclusion setup is completed.

  • Baby removal is handled before sealing the animal out
  • Raccoon and squirrel baby removal can be an add-on
  • The technician explains the adjusted scope before work continues
05

Follow-up visit

After the animal has had time to exit, we return to confirm activity has cleared. Equipment is removed where appropriate and the entry point is prepared for repair.

  • Confirm the animal is no longer using the entry point
  • Remove one-way door equipment where appropriate
  • Check whether new damage or secondary access appeared
06

Sealing, repair, and prevention

The final step is closing the current opening and reducing future risk. This can include sealing, mesh, vent covers, roof or vent repair, and waterproofing where relevant.

  • Durable wire mesh, fasteners, and vent protection
  • Repair of current animal damage within the quoted scope
  • Prevention advice for roofline, garbage, branches, and vents
One-way wildlife door installed around a roof opening
One-way doors and safe exit

Why the entry point is not sealed on the first visit.

If an active raccoon or squirrel entry is sealed immediately, the animal can be trapped inside the attic or walls. A one-way door gives the animal a controlled exit first. Once activity is clear, the opening can be sealed or repaired.

Exit first

The animal leaves naturally through the one-way door.

No re-entry

The door blocks return through the same opening.

Follow-up check

We confirm activity has cleared before closing the hole.

Repair after

The entry point is sealed, meshed, or repaired within scope.

Repair and prevention scope

What happens after the animal leaves?

The follow-up visit is where the property gets protected. Depending on the quote, Sterex may seal the active opening, install mesh, replace or cover vents, repair current animal damage, add waterproofing where relevant, and recommend prevention steps for weak points nearby.

Sealing and current damage repair
Roof vent covers and vent replacement
Wire mesh and chimney or pipe cutouts
Waterproofing around vulnerable repairs
Garbage, branch, and roofline prevention tips
Shop products for prevention where DIY makes sense

Quote and approval flow

Wildlife pricing depends on the service, access, baby removal, damage repair, vent cover count, and any manual adjustment for difficult work. The technician explains the quote before the customer approves the scope.

The internal quote tool is for staff use, so the public path is simple: book online or call the 289 number.

Wildlife removal process FAQ

Two visits let the technician first inspect and set up humane exclusion, then return to confirm the animal has left before sealing or repairing the entry point.

If young are present, the technician may need to remove them manually before installing a one-way door or completing exclusion work. Baby removal is a priced add-on for raccoon and squirrel jobs.

Sterex can seal the active entry point, repair current animal damage, install wire mesh, add roof vent covers, and waterproof vulnerable repair areas where relevant. The approved quote defines the exact repair scope.

A wildlife inspection costs $100–$150 plus 13% HST and requires roof access. The inspection identifies the animal, active entry point, damage, and the removal or exclusion work needed.

All wildlife work carries a 3-month warranty on the area and protection Sterex serviced. If a raccoon damages a Sterex one-way door or installed wire-mesh protection during that period, Sterex returns to correct the covered work at no charge.

Need wildlife removed or an entry point checked?

Request service or call Sterex. We will inspect the property, explain the removal plan, and quote the repair or prevention scope clearly.

Last updated: